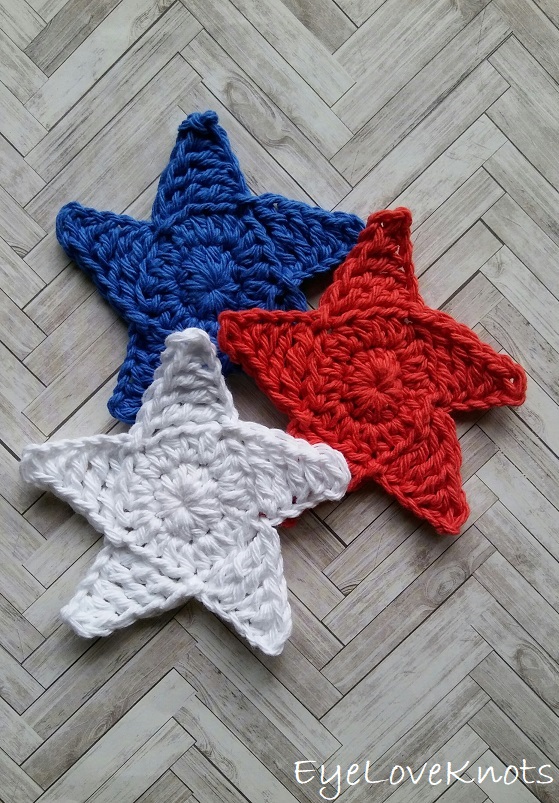
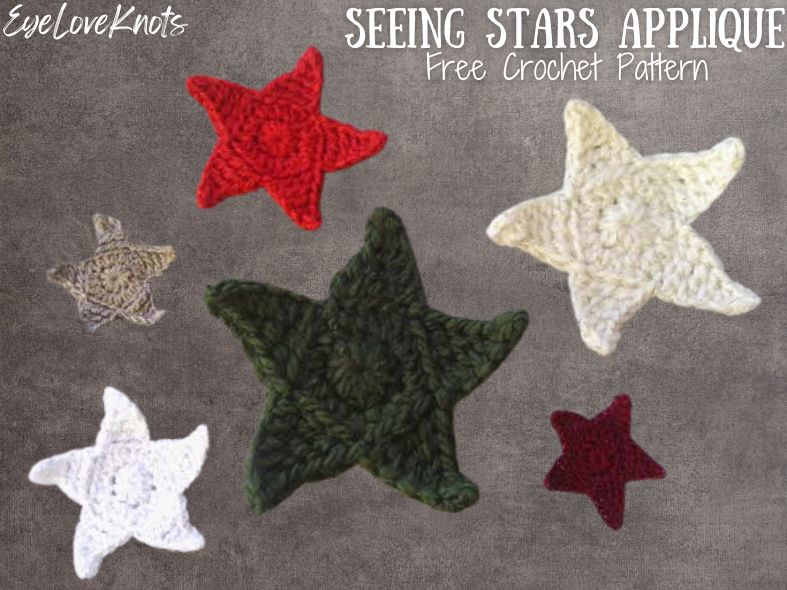
Learn how to crochet quick star appliques that are perfect for an Americana themed project or Farmhouse 4th of July, or change the colors of the stars for a Nursery, Graduation, Christmas and New Years! Video tutorial included.
This post contains affiliate links. If you make a purchase by clicking on them, I make a small commission at no extra cost to you. I only recommend products I love and hope you’ll love them too! Click here to find out about the different affiliate programs I am apart of. This post also contains shop links to my yarn shop and craft store, Yarn Crafts & Coffee. You can shop online or in person in Melbourne, Florida.
Find the free crochet pattern instructions below, or purchase a printer-friendly, ad-free PDF on Ravelry by clicking here.
In a hurry? Pin this for later when you have more time.

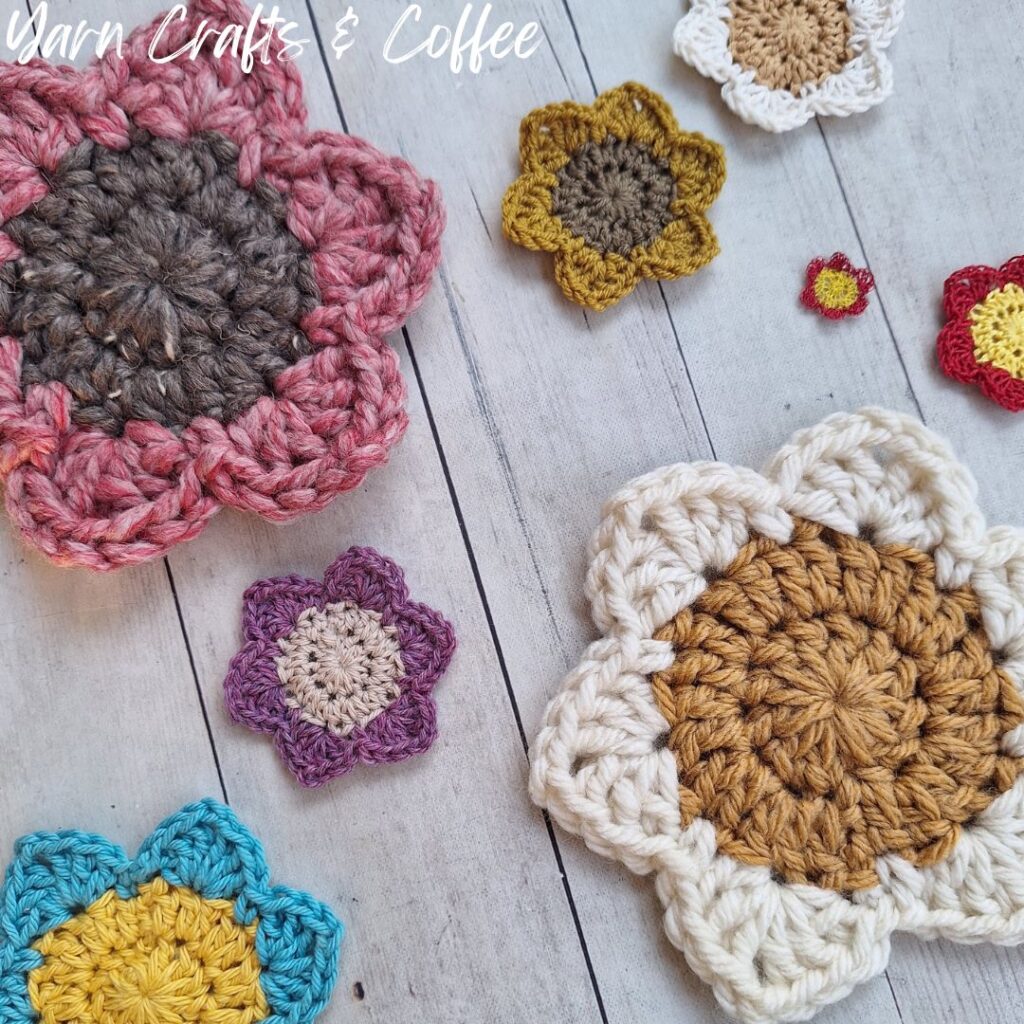
One of the fun things I love to do with crocheted appliques is work up the same pattern in different weight yarns to see what sizing I can get, and then see how the applique could be used. I’ll show some examples:
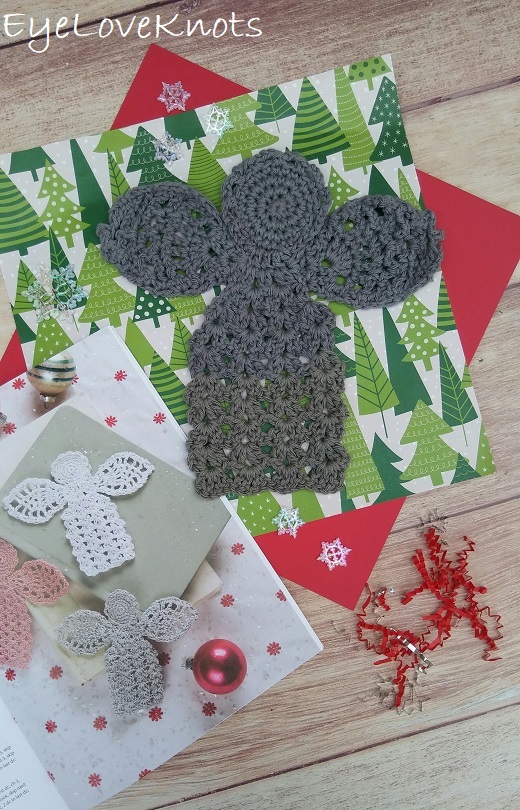
Lacey Angel, originally a bookmark pattern. I worked one in sewing thread, and one in worsted weight cotton yarn.
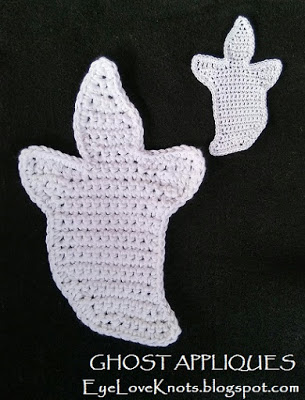
Ghosts, originally a coaster pattern. I worked on as written in worsted weight cotton yarn, and one in a #10 cotton crochet thread.
WHAT CAN I MAKE WITH A CROCHETED APPLIQUE?
There are so many possibilities for crocheted appliques, here are a few of my ideas:
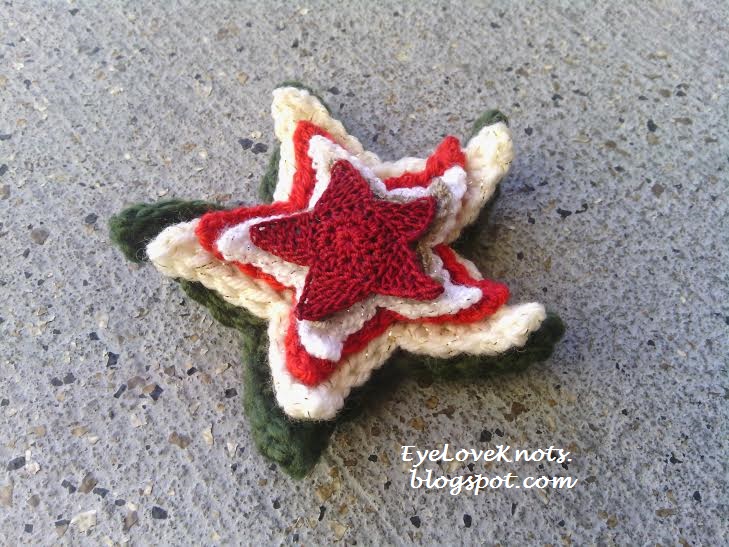
- Work in 100% cotton yarn to use as coasters, like I did in my Seeing Stars Coasters, or as large facial scrubbies – the textured center is great for exfoliating!
- Make several and string up to make a garland for wall decor, mantel, entryway table, etc, or hang as an ornament. You may need to starch the stars to get them to lay flat.
- Worked in a lightweight #3 yarn or lighter, glue to an alligator clip for a cute hair accessory.
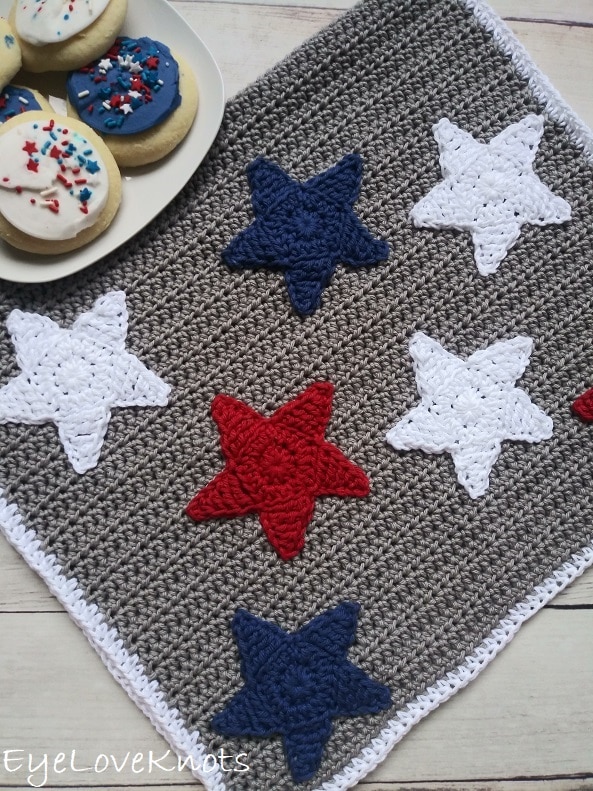
- Sew onto a scarf, afghan, throw pillow, tote bag, etc, like I’ve done in my Seeing Stars Throw Pillow and Seeing Stars Hand Towel.
- Work in #10 cotton crochet thread and hang from earring wires for a cute pair of earrings (you may need to starch), or try sewing thread for a tinier star that might even work inside an earring hoop!
- Glue to the front of a card.
- Make several, and glue onto a wreath base.
These Stars are featured in the Seeing Stars Crafting Event hosted on my Yarn Crafts & Coffee blog.
You Might Also Like:
Ad-Free, Printer Friendly PDF:

EyeLoveKnots newsletter subscribers get access to Exclusive Subscriber Content, like the free PDF of this pattern via the Free File Library – you’ll find the tab on the top menu. The library is password protected so sign up for my newsletter and you’ll receive a Welcome email containing this month’s password, or if you are already a blog subscriber, reference your latest newsletter for this month’s password. From the library, you’ll be able to access the PDFs via Google Drive – you do not need to have a Google Drive account to view and download the PDF.
For a Limited Time…
Through 05/11/26 at 11:59pm EST, you can grab a free copy of the PDF for the Seeing Stars Applique on Ravelry using code STARS26. I earn my income from the number of pageviews my blog sees, so please do not share the code, but instead share the link to this post so others can find it. Thank you!
After 05/11/26 or for non-subscribers, if you would like a PDF version of this post, you may get one through either my Etsy Shop, LoveCrafts Shop or Ravelry Shop for a small fee. This fee is to compensate for the views lost when you no longer need to return to the blog to for the information, as you will have your own copy. Pin this post to save it for later.


What Materials Do I Need to Crochet a Star?
- 12 Yards of Yarn & Respective Crochet Hook
- Tapestry Needle
- Scissors
Material Notes
Any weight yarn will do – star measurements will vary.
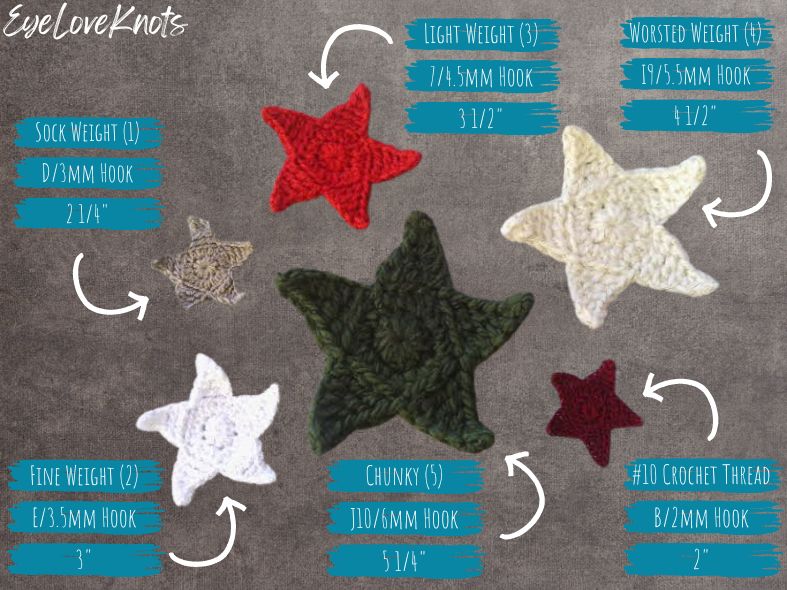
Here is what I used for mine:
- #10 Cotton Thread & B/2mm Hook – I used Aunt Lydia‘s Classic Crochet Thread in Burgundy
- Fingering / Sock Weight (1) & D/3mm Hook – I used Premier Yarns Wool-Free Sock Yarn in Pueblo (discontinued)
- Sport / Fine Weight (2) & E/3.5mm Hook – I used Lion Brand’s Vanna’s Glamour in Diamond (discontinued)
- Lightweight (3) & 7/4.5mm Hook – I used Hobby Lobby’s I Love This Sport Weight in Red
- Worsted Weight (4) & I9/5.5mm Hook – I used Hobby Lobby’s I Love This Yarn in Ivory Sparkle
- Chunky Weight (5) & J10/6mm Hook – I used Premier’s Serenity Chunky in After Dark, which sadly has been discontinued though as of 05/10/26, you can still find limited stock
If you would like to use sewing thread, pair it with a 0.60mm or 0.75mm steel hook, which you can find in the Clover Amour Crochet Hook listing linked below.
We have lots of great crochet hooks in our Yarn Crafts and Coffee Yarn Shop. The most popular, and preferred by Candace and Emily, are the Clover Amour Crochet Hooks with the soft handles and smooth metal hook. Alexandra prefers metal crochet hooks with large, ergonomic clay handles and just loves the fun designs from SiennasBowtique and BronzeShepherdStudio! If your preference is wood, the LYKKE brand are lovely, smooth and sturdy.
Tapestry Needles with the blunt, round end are essential for sewing and finishing on a number of yarn crafts, including crocheting, knitting as well as needlepointing on fabric and plastic canvas. The blunt, rounded end allows the needle to pass easily through the fabric created by yarn and holes on canvas without snagging (or getting your fingers) in the process. More specifically for crocheting and knitting, a Bent Tip Tapestry Needle makes weaving, grafting and sewing so much easier on the hands. The long oval eye makes threading strands of yarn easier, though you may still want to use a needle threader.
Scissors are an essential tool. When I’m working on the go, I like to carry a pair of folding scissors as they fit perfectly in even the tiniest of bags. When I am working at home or have more space in my bag for a larger notions pouch, I like to use a pair of lightweight, all-purpose scissors as they are so versatile and great for a variety of things from cutting plastic canvas mesh to trimming yarn ends after weaving in to cutting out a care card to include with a handmade gift.
How Long Does it Take to Crochet a Star?
I had each star ready to go in about ten minutes!
Measurements from Point to Point:
- Sock Weight | Burgundy: 2″
- Fingering Weight | Pueblo: 2 1/4″
- Sport Weight | Diamond: 3″
- Lightweight | Red: 3 1/2″
- Worsted Weight | Ivory Sparkle: 4 1/2″
- Chunky Weight | After Dark: 5 1/4″
Gauge:
Not essential for this project and will vary.
I will add that with an H8/5mm hook and Lily Sugar n Cream as well as Lion Brand Local Grown Cotton, my gauge after completing Round 2 before cinching the beginning closed was just over 2″, and after cinching closed was 1 7/8″.
Abbreviations (US Terms)
- SC – Single Crochet (Photo Tutorial)
- HDC – Half Double Crochet (Photo Tutorial | Video Tutorial)
- DC – Double Crochet (Photo Tutorial)
- TR – Treble Crochet aka Triple Crochet [yarn over twice, insert hook into stitch, yarn over, pull through (4 loops on hook), (yarn over, pull through two loops) 3x]
- DTR – Double Treble Crochet aka Quadruple Crochet [yarn over three times, insert hook into stitch, yarn over, pull through (5 loops on hook), (yarn over, pull through two loops) 4x]
Pattern Notes:
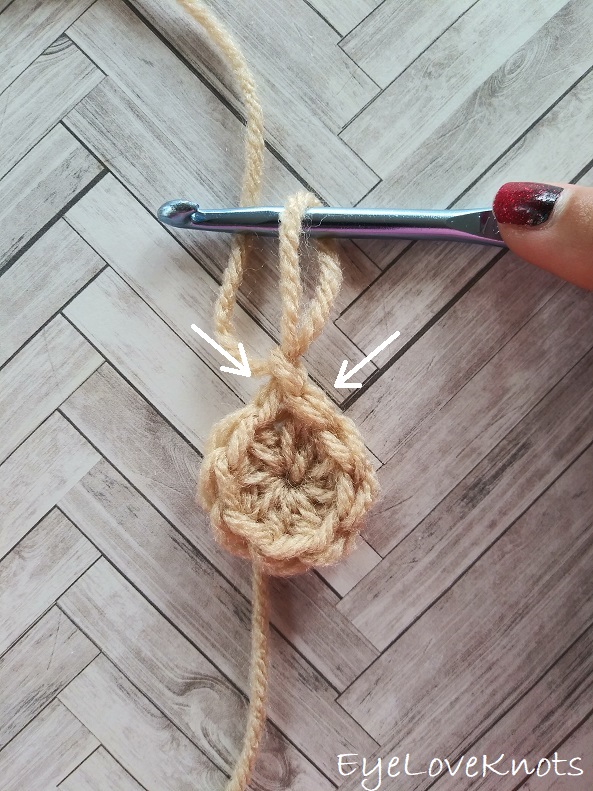
I work my crown and body differently than most to help keep my seam straight, and that is that the first stitch from the first set of increases is done in the first stitch of the round, which will appear just to left of the beginning chain, then the round will be worked as normal, and the final stitch of the round will be the second stitch of the first set of increases, and it will be worked into the same stitch as the first, and appear just to the right of the beginning chain. The photo above shows where the first and last stitch are worked, and I have a photo tutorial of this technique in my How to Keep a Straight Seam post. You can work in your preferred increase method as long as we end up with the same stitches at the end of the round.
Though there are only two rounds, and a straight seam isn’t really an issue, this is my preferred method – you can work in your preferred increase method for the center as long as you end up with 20 stitches.
Should you starch or block your finished star? That depends on the yarn you’re using, your preference and what you will use your star for. Examples:
- If you will be hanging the star for an earring or garland, I would recommend starching to give it a defined shape, otherwise, it will curl up while hanging.
- If you will be using the star flat on a surface, such as for a coaster, then you can most likely finger press the star flat, but if you want a more relaxed and defined shape, then blocking is the way to go.
- This is the same if you’ll be sewing it onto something. You can stretch it a lot and tack down all spots so I wouldn’t worry with finishing, but if you want more relaxed and defined, then block.

Quick Star Applique Video Tutorial:
Quick Star Applique Crochet Pattern:
Chain 5. Join to form a ring. Chain 1, work 10 HDC into the ring. Join to the 1st HDC. (10 HDC)
R2: Chain 1, HDC in the 1st HDC, 2 HDC in each of the next 9 HDCs, HDC in the last HDC. Join to the 1st HDC. (20 HDC)
Note: This is a great time to weave in the beginning tail end as it’s the easiest to get to.
R3: (Chain 6 and work down the chain, SC in the 2nd chain, HDC in the 3rd chain, DC in the 4th chain, TR in the 5th chain and DTR in the 6th chain; Back to the circle, skip the first stitch that the chain 6 is coming out of, and next three HDCs, slip stitch in the 5th stitch) 5x, ending with a slip stitch joined in the same stitch as you began the round.
Finishing:
- Option 1: Fasten off with a regular length, and weave in ends. Use as is, or attach to project by gluing on or sewing on.
- Option 2: Fasten off with a long tail end for sewing, and weave in initial tail end only. Use long tail to sew onto a project.
Please feel free to make and sell your own items made using this pattern, but keep in mind, this written pattern and my photos are protected by copyright. Please DO NOT claim this pattern as your own nor should you sell my pattern. DO NOT re-publish my photos as your own. DO NOT copy and paste my pattern anywhere, link to it instead so other’s can visit. Making videos providing instructions how to make my projects on any social media platform is also not permitted.
Join one of our awesome Facebook groups to share your creations, and see what others are up to!
– Yarn Crafts & Coffee Community
– DIY Home On Rockwood Lane
– Alexandra Lane Lifestyle
I was so going to make stars for the tree this year…who knows I might even manage to do it still!
I'm right there with ya on the "might even manage to…" Hehe. Happy Holidays, Stella!
I am somewhat jealous of your hooks. I have one that is like that, and it is so much more comfortable to use.
🙂 Thanks for dropping me a line
These hooks look amazing!! I hate that some hooks cover up the sizes or only have one. I prefer to know the mm. I too have a hard time finding ergonomic hooks that fit in my hands. These look like they might be a good option
These were a GREAT option for me! I love the fun colors, when in turn makes it easy to remember which size is which. They also feel awesome in my hands – I crochet so much that my hands ache all the time, and these definitely help with that.
it is great to be able to try all of the products. the carrying bag is really cute – craftyone
It is! I was a little worried about what kind of bag I'd be getting, but I couldn't have asked for a better bag! And now I found out they have other fun options too.
Hi I’m just learning how to make the stars but I need to make one big one for a blanket I’m making but I’m not sure how to. I can make a small one but how many more chains and double crochets do I use?? HELP PLZZ!!
This small one already requires quite a few yarn overs, and large stitch (quad). I am not sure how much larger you need to go, but you might have more luck working a large circle/hexagon, and then work back in forth to create the star shape.