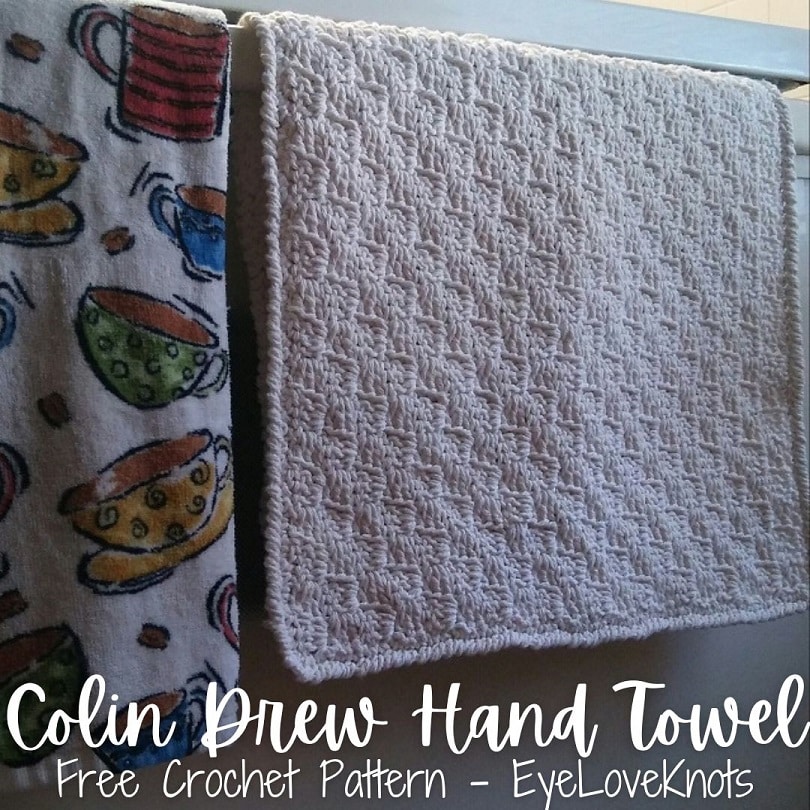
This is a free crochet pattern and video tutorial showing how to crochet the Colin Drew Hand Towel, an easy corner to corner hand towel worked in double crochet boxes. This hand towel also works great as a large doily/small runner for displays, and as a placemat.
This post contains affiliate links for LoveCrafts, WeCrochet and Amazon. If you make a purchase by clicking on them, I make a small commission at no extra cost to you. Thanks for your support!
Find the free crochet pattern instructions below, or purchase a printer-friendly, ad-free PDF on Ravelry by clicking here.
In a hurry? Pin this for later when you have more time.
Since I published my Colin Drew Washcloths (Free Crochet Pattern) back in August of last year (2018), I have been wanting to make a hand towel version.
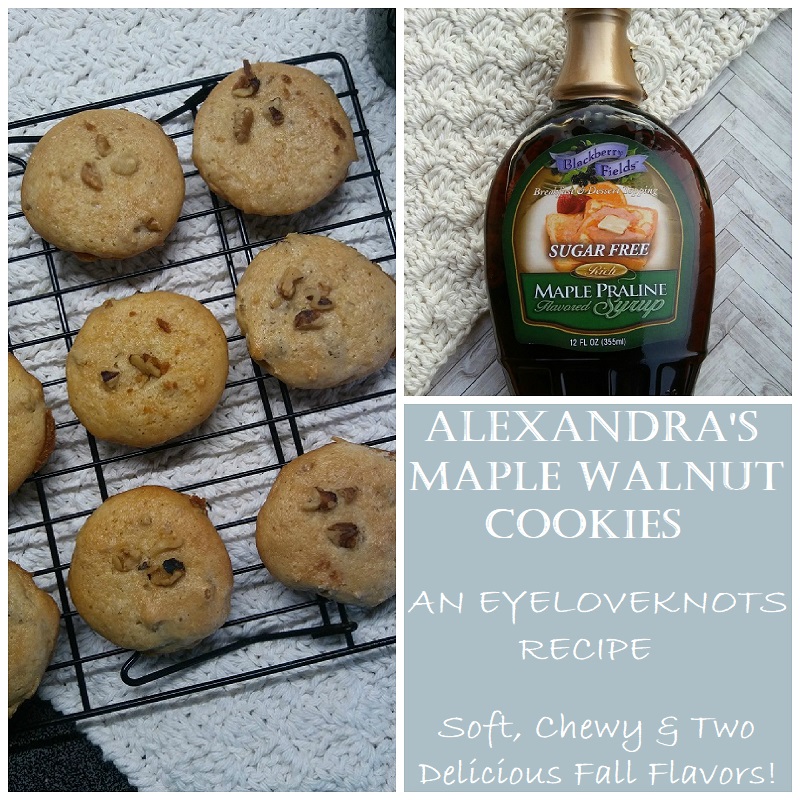
I actually finished this hand towel at the end of September with the intention of publishing shortly after Alexandra’s Maple Walnut Cookies, since I made it to go along with them, but October was a busy month for me with blog hops, and it just didn’t work out.
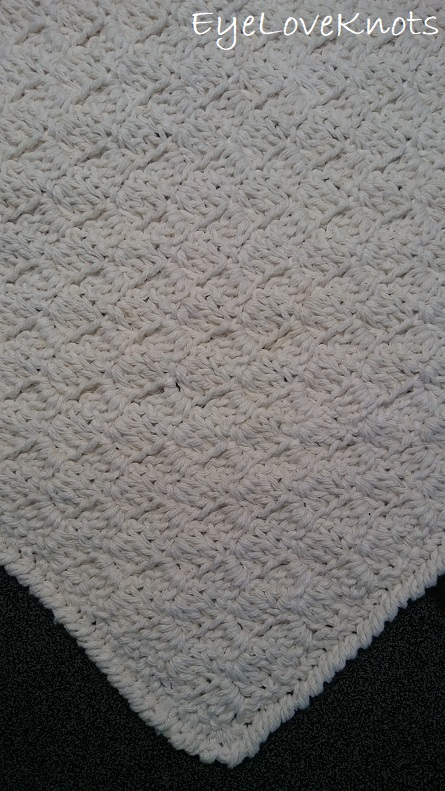
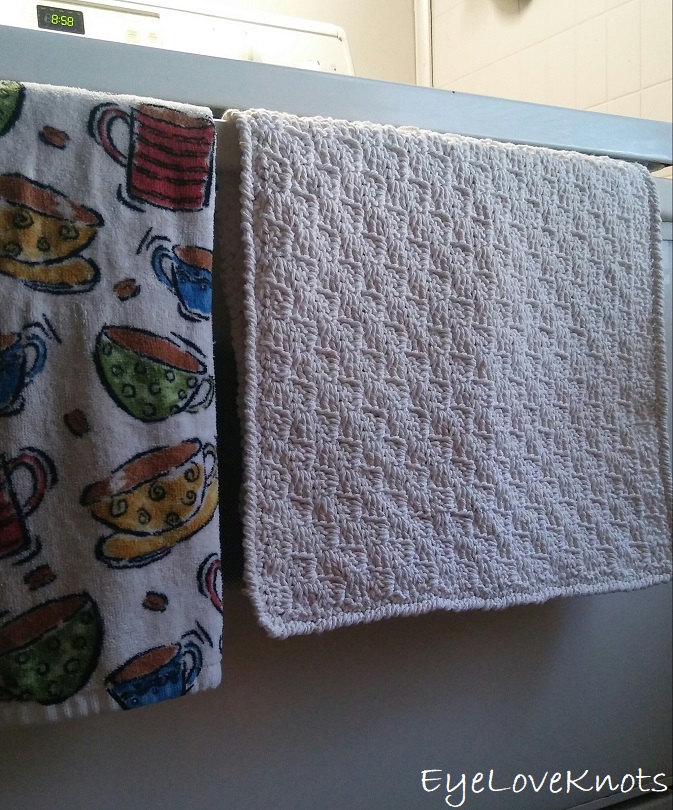
Many of the things I make end up being gifted to others, sold or donated, but this is something I made for myself, and it’s hanging in my kitchen on the handle of my stove just like you see in the photo.
As a washcloth, C2C can sometimes become saggy because of the spaces in the boxes, and by spaces, I really just mean like a slit from the beginning chain that all the stitches are worked onto. I use my washcloths either for decorative purposes, or just to dry things up – not to wash anything with because of this, and I use the hand towel the same way. It’s held up well, and despite being hung, it hasn’t stretched out too much (under 2″). I’m loving it!
Alternatively, this hand towel also works great as a large doily/small runner for displays, and as a placemat.
Colin Drew is an easy crochet line that features double crochet corner to corner boxes. This is a beginner friendly series, and this hand towel is a great project to pair with watching your favorite TV show or movie. You don’t even have to count boxes if you don’t want to! You can use a soft tape measure to measure as you go, and stop at the width and length desired, though I will be providing box counts for each size in the written pattern.
Find more Colin Drew accessory and home decor crochet patterns here on EyeLoveKnots, and Colin Drew accessory and wearables crochet patterns on Cre8tion Crochet.
Make Matching C2C Pieces for Your Home with these Free Crochet Patterns:
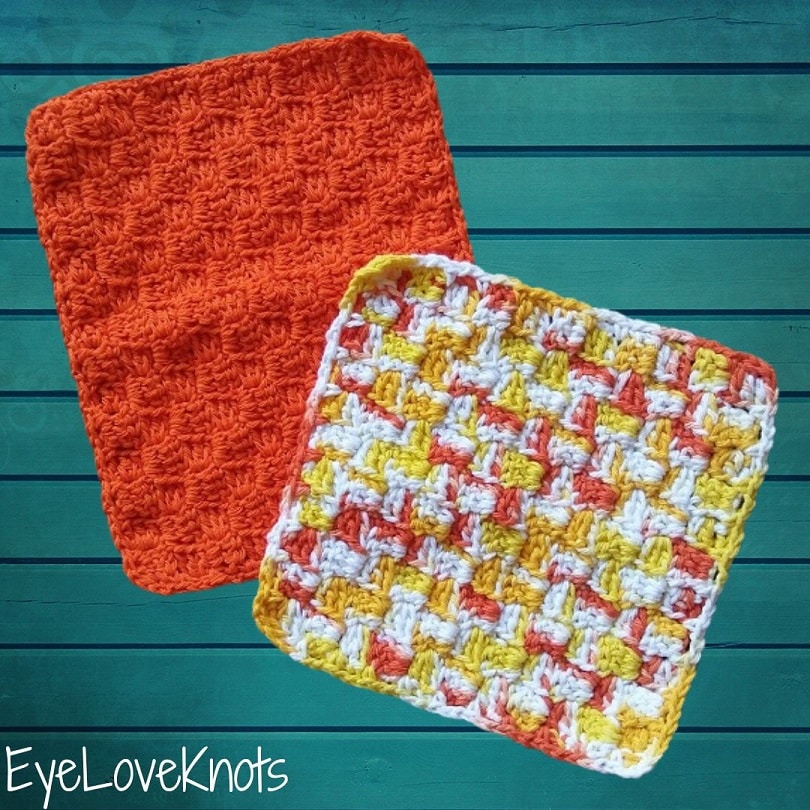
Colin Drew Washcloths (6 sizes)
What is the difference between a hand towel and a dish towel?
A hand towel and dish towel are practically one in the same with the biggest difference being how you use it.
What is the difference between a hand towel and a washcloth?
A hand towel and washcloth are towels of different sizes used for different purposes, and depending on where you use them.
In the bathroom, a washcloth is often used to clean the face or clean and exfoliate in the the shower, while a hand towel is going to be found hanging near the sink to dry off one’s hands.
In the kitchen, a washcloth (or dishcloth) is used to wash and/or dry dishes, while a hand towel is most often going to be found hanging from the oven handle or near the sink to dry off one’s hands, though they’re also used to dry dishes and clean up messes.
What size should a hand towel be?
The average size of a hand towel is 15″ by 25″, which is the size I aim for in my designs, but they do come in a range most often seeing 15″ by 25″, 16″ by 30″ and 18″ by 30″ depending on your preference.
Where do use a hand towel?
Hand towels are most often used in the bathroom and kitchen hung near the sink.
Alternatively, a hand towel also works great as a large doily/small runner for displays, and as a placemat.
How do you hang a hand towel?
While there is no right or wrong way to hang a hand towel, the most common ways are to hang from a bar in it’s full length and width just draped over with equal lengths on the back and front, or to fold it in half width-wise or 3rd’s width-wise, keeping the full length and then hang from a bar or feed through a ring so there are equals lengths on the back and front.
HOW OFTEN SHOULD I CLEAN AND CHANGE a Hand Towel?
A hand towel used to dry one’s hands should be washed about once a week, unless you have highly sensitive skin or a compromised immune system, then you’ll want to change every 2 – 3 days as it harbors bacteria, and possible mold growth if it doesn’t dry out properly, and can hold onto debris.
What is the best yarn to use to crochet a hand towel?
There are many fibers that make nice crocheted hand towels, though cotton yarns are used the most and are very durable for repeated use and washing. Worsted weight is the most common weight of cotton yarn used for crocheted hand towels, but there are also several nice lightweight yarns as well.
I prefer using WeCrochet Dishie Yarn for my hand towels. This worsted weight cotton yarn is colorfast, meaning the color is set and not going to fade or bleed. My experience with Lily Sugar n Cream, Bernat Handicrafter and Crafters Secret Cotton is that with one wash, the colors fade a lot, and some colors, like greens and blues, bleed if laid down on a surface while wet. It’s so disheartening to spend so much time crocheting a project only to have it ruined with one wash. I’ve heard that I Love This Cotton Yarn is also colorfast, and seems to be the choice for many crocheters that do markets as it’s also softer.
Cotton blends work well for hand towels, and the synthetic fiber they’re combined with, such as acrylic or polyester, will often add a bit more durability, however, they lack the absorbency so they do need the plant based fiber.
Linen also makes for a really lovely hand towel. It gets strong when wet, and gets softer and nicer with each wash. Linen blends often combine with cotton or bamboo to add softness.
Bamboo yarns have a high absorbency – even more than cotton – however, bamboo is weaker when wet, and more prone to developing mold so if bamboo is a fiber you want to use, I definitely recommend going with a blend of linen and/or cotton.
Gauge is not essential for this project and with the corner to corner nature, you can easily substitute in any weight yarn and measure as you go.
Will my crocheted hand towel stretch?
It’s not recommended to hang crocheted items as they can stretch, especially if wet because they’re heavier, but when crocheting a hand towel, it’s hard not to hang it when that’s it’s intended use. Tighter stitches will help not stretch so much. With that said, this hand towel has stretched about 2″ in length while being hung on my stove handle.
Do I need to work a border around my hand towel?
I did add a border to my hand towel for a more finished edging, but you do not need to add one. If you opt not to work a border, you may want to add an extra box to width and height so the hand towel will come out to about the same finished size.
Ad-Free Printer Friendly PDF:

If you would like a PDF version of this post, you may get one through either my Etsy Shop, Ravelry Shop or LoveCrafts Shop for a small fee. This fee is to compensate for the views lost when you no longer need to return to the blog to for the information, as you will have your own copy. In a hurry? Pin this for later when you have more time!


Save this to your Favorites: AllFreeCrochet, FaveCrafts, Crochet Pattern Bonanza, AllFreeCrochetAfghanPatterns, Cheap Thrifty Living, DIYideaCenter, AllFreeHolidayCrafts, Free Crochet Tutorials
Materials:
- 165 (260, 490) Yards of Worsted Weight Cotton Yarn – I used Lily Sugar n Cream in the Ecru [Cream]
- H8/5mm Crochet Hook – I love this Koi Fish Ergonomic Clay one from SiennasBowtique on Etsy
- Tapestry Needle
- Optional, Jewelry Pliers
- Optional, Tape Measure if you want to take gauge or measure as you go
Material Notes:
Yarn Alternatives: WeCrochet Dishie Yarn, Crafters Secret Cotton
I usually recommend jewelry pliers to use to help weave in ends, as cotton yarn can be quite tough on the fingers when weaving in with just fingers and a tapestry needle. Dishie Yarn is really smooth, and easy to weave the yarn in and out of.
Time Spent:
Just over 3 hours for the regular size.
Measurements:
- Extra Small: 5 1/8″ Wide by 26 3/8″ Tall
- Small: 8″ Wide by 26 3/8″ Tall
- Regular: 15 3/8″ Wide by 26 3/8″ Tall
Gauge (Not Essential):
5 Boxes Wide & Tall = 3 3/4″
With the nature of this stitch pattern, the easiest way to measure is to do so in pattern. Measure the width (before the border), and this will be about 5/8″ smaller than finished width. Same goes for the height. You can easily add or take away boxes as you go.
Abbreviations:
- DC – Double Crochet (Photo Tutorial)
- SC – Single Crochet (Photo Tutorial)
- C2C – Corner to Corner (Photo Tutorial for DC Boxes)
- Rev SC – Reverse Single Crochet/Crab Stitch
Pattern Notes:
Beginning chain 2 counts as a double crochet. Beginning chain 1 does not count as a stitch.
A box is comprised of four double crochet’s.
Working the final double crochet into the foundation chain from the previous row helps to keep the edge more even. After completing the first box, your edge may look a little wonky. You can use your fingers to manipulate the fabric, but the border will cover it up and it will look nice and straight.
The border adds about 5/8″ to the height and width. If you do not want to add a border, you may want to add 1 box to width and height to get closer to the finished measurements.
Colin Drew Hand Towel, Video Tutorial:
Colin Drew Hand Towel, Written Pattern:
Chain 6. DC into the 4th chain, and into each of the next 2. (1 Box)
R2: Chain 6, and turn. DC into the 4th, 5th and 6th chains. You now have an alligator mouth shape. Flip the bottom fabric so it’s mirrored and slip stitch into the top of the next chain 2, which is the stitch that is the most natural to work into when you lay your 2 boxes together. Chain 2. Looking at the next box, you see the stitches laying horizontally. Work 2 DC into the space in between the top 2 stitches. To help keep a straight edge, work the last DC into the foundation chain on the left side. (2 Boxes)
R3: (I) Chain 6, and turn. DC into the 4th chain, and into each of the next 2. Flip your fabric and slip stitch into the top of the next chain 2;
(II) Chain 2, work 3 DC into the space in between the top 2 stitches of the same box, slip stitch into the top of the next chain;
(III) Chain 2, work 2 DC into the space in between the top 2 stitches of the same box, DC into the foundation chain on the left side. (3 Boxes)
R4 – 6 (10, 20): Using Row 3 as a base, you will continue working in the same manner repeating (II) one extra time each row to increase the number of boxes by one each row. At the end of row 7, you will have 7 boxes.
Now the width is as wide as we want it to be, we will no longer be starting with a chain 6 width-wise (though we will continue to start with a chain 6 height-wise). Instead, each time we are starting from this side, we will chain 1 and slip stitch over, then begin with a chain 2 to form a straight edge.
If you want to add width here, you can work an additional row before beginning the decrease on this side.
Next Row: Chain 1, and turn. Slip stitch into the 2nd, 3rd and 4th stitches. Chain 2, work 3 DC into the space in between the top 2 stitches of the same box, slip stitch into the top of the next chain;
(chain 2, work 3 DC into the space in between the top 2 stitches of the same box, slip stitch into the top of the next chain) over to last box;
Chain 2, work 2 DC into the space in between the top 2 stitches of the same box, skip the next 3 DC, DC into the foundation chain on the left side.
We still want to add height, so when we are starting from this side, we will continue to begin with a chain 6 and work down to form the 1st box. As we work across this row, we will slip stitch to the last box, and not chain 2 to work an additional box on top (because the width is already as wide as we need it).
Following Row: Chain 6, and turn. DC into the 4th chain, and into each of the next 2. Flip your fabric and slip stitch into the top of the next chain 2;
(chain 2, work 3 DC into the space in between the top 2 stitches of the same box, slip stitch into the top of the next chain) over to the last box.
Continue alternating these last two rows until you have 35 boxes tall counting vertically (not counting in pattern rows, just counting vertically from the first box). You will maintain the same number of boxes (counting width-wise).
Now the height is as tall as we want it to be, we will no longer be starting with a chain 6 at all. Regardless of the side, we will chain 1 and slip stitch over, then begin with a chain 2. With each row, the number of boxes will decrease by 1.
If you want to add height here, you can work an additional row before beginning the decrease on this side.
Remaining Rows Until You Have 3 Boxes Left: Chain 1, and turn. Slip stitch into the 2nd, 3rd and 4th stitches. Chain 2, work 3 DC into the space in between the top 2 stitches of the same box, slip stitch into the top of the next chain;
(chain 2, work 3 DC into the space in between the top 2 stitches of the same box, slip stitch into the top of the next chain) over to last box.
3 Boxes Left: Chain 1, and turn. Slip stitch into the 2nd, 3rd and 4th stitches. Chain 2, work 3 DC into the space in between the top 2 stitches of the same box, slip stitch into the top of the next chain, chain 2, work 3 DC into the space in between the top 2 stitches of the same box, slip stitch into the top of the next chain. (2 Boxes)
Last Row: Chain 1, and turn. Slip stitch into the 2nd, 3rd and 4th stitches. Chain 2, work 3 DC into the space in between the top 2 stitches of the same box, slip stitch into the top of the last stitch. (1 Box)
Border:
Round 1 is basically 1 SC in the space in between each box, a chain 2 in between SCs over each box, and we’ll increase in each corner stitch. Round 2 is 1 Rev SC into each chain space and each SC without increasing in the corner chain spaces.
For a more rounded corner, do (SC, chain 1, SC) or 3 SC, and for a more square corner, do (SC, chain 2, SC) or (SC, HDC, SC).
R1: Chain 1, turn. SC into the space between the boxes just under your current place, chain 2, (SC, chain 3, SC) into the corner stitch, [chain 2, (SC into the space in between the next 2 boxes, chain 2) across, (SC, chain 3, SC) into the corner stitch, chain 2] 3x, chain 2, (SC into the space in between the next 2 boxes, chain 2) across until you’re back to the beginning, then join to the 1st SC.
R2: Chain 1. Rev SC into the next chain space and into each SC and chain space all the way around working just one stitch per corner. Fasten off, and then join similar to that of invisible join just mimicking the look of the other stitches.
Weave in ends.
Please feel free to make and sell your own items made using this pattern, but keep in mind, this written pattern and my photos are protected by copyright. Please DO NOT claim this pattern as your own nor should you sell my pattern. DO NOT re-publish my photos as your own. DO NOT copy and paste my pattern anywhere, link to it instead so other’s can visit. Making videos providing instructions how to make my projects on any social media platform is also not permitted.
Join one of our awesome Facebook groups to share your creations, and see what others are up to!
– Yarn Crafts & Coffee Community
– DIY Home On Rockwood Lane
– Alexandra Lane Lifestyle
Linked Up To…
Craft Schooling Sunday – Creative Jewish Mom
Weekly Link Up – Claire Justine
Handmade Monday #151 – Sum of their Stories
The Really Crafty Link Party #193 – Keeping it Real
Craftastic Monday Link Party – Sew Can Do
Ginx Woolly Linx Party November – Ginx Craft
Little Cottage Link Party #27 – Love my Little Cottage
All About Home Link Party #14 – Common Ground
The Linky Ladies Party #171 – The Purple Poncho
Tuesday Turn About #25 – My Wee Abode
{Wow Me} Wednesday #429 – Ginger Snap Crafts
The Wednesday Link Party 321 – The Stitchin’ Mommy
Your Whims Wednesday #433 – My Girlish Whims
Hookin’ on Hump Day #202 – Moogly Blog
Creativity Crafty Link Party #197 – Life Beyond the Kitchen
Thursday Favorite Things #415 – An Artful Mom
Pin Party #342 – The Pin Junkie
Best of the Weekend – Calypso in the Country
Home Matters #259 – Modern on Monticello
Create, Bake, Grow & Gather Party #393 – Shabby Art Boutique
Scrappy Stitchers Link Party #57 – Stitches n Scraps
Snickerdoodle Create Bake Make Link Party #310 – EyeLoveKnots
One More Row – Free Pattern Link Party #13 – Loops and Love Crochet
Awesome! Pinning!
Thanks, Michelle!
I’m in agreement of the stretching of the C2C dishcloths.
We always have a glass of ice water sitting on the counter and it sweats horribly. I use the ones I have made as a coaster or to set the rinsed coffee cups upside down on to drain.
I want to try to make a large C2C towel using a smaller hook. I’m thinking about using it as a place mat.
I would like to make some placemats too. I would say you could easily go down to a G6/4.25mm hook if it doesn’t have a shallow mouth. Otherwise, simply do the C2C pattern using half double crochet stitches instead of double crochets – there will be less room for stretching.
Love it, and a great way to try out c2c! thanks for sharing on craft schooling Sunday!
Half DC sounds good too. I’m hoping to get started on them soon. They should work up fast.
Thx for the pattern.
Even though mine took nearly three hours, I really feel like it flew by. Enjoy 🙂 Would love some feedback if you get a chance to work it up.
I have never mastered the art of C2C crochet, somehow all my experiences turn out wonky…maybe I’ll try your pattern this time and see if I have better luck.
Thank you for sharing at The Really Crafty Link Party. Pinned.
Hehe. If there’s anything specifically that troubles you, let me know, and I will try my best to help you out 🙂
Crocheting looks so complicated, wish I knew how to get started!
I will say, I started to learn to crochet twice before, and it was like nothing was clicking, and I was frustrated with it, but the last time I wanted to learn, I found Emi of the Hectanooga1 YouTube channel, and she really made it so easy to learn and follow. For the first time, I felt like all those sentences of abbreviations I saw in patterns finally made sense. Then, I went to JoAnn’s, and found a teach me to crochet kit in the kid’s craft aisle, and I worked up a sunglass pouch. From then on, I was hooked.