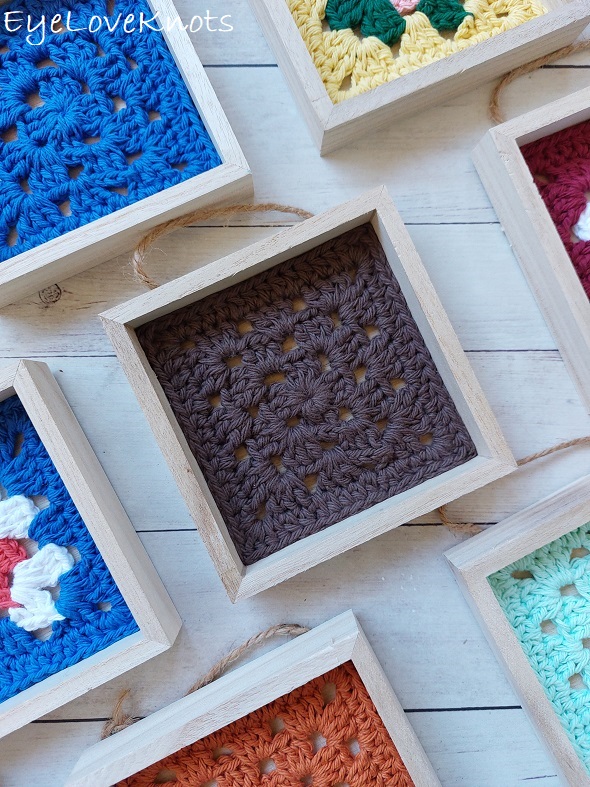
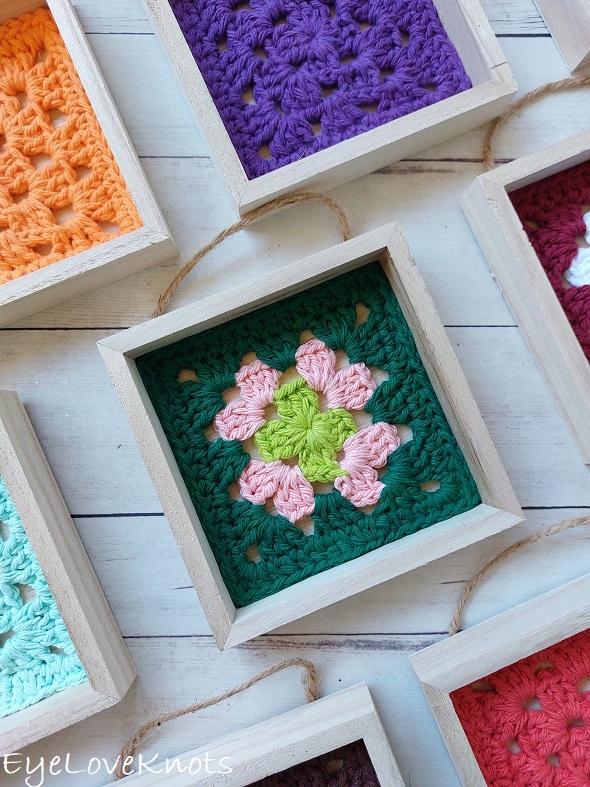
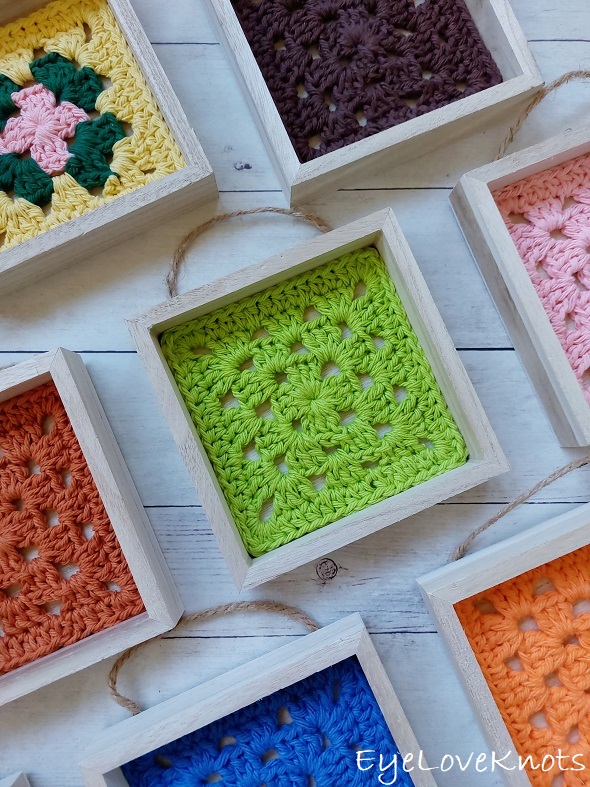
This is a beginner friendly, free crochet pattern and video tutorial showing how to crochet a granny square and create a shadow box with it. Perfect for a gallery wall, or tiered tray!
This post contains affiliate links for Etsy, WeCrochet, LoveCrafts & Amazon. If you make a purchase by clicking on them, I make a small commission at no extra cost to you. Thanks for your support!
Find the free crochet pattern instructions below, or purchase a printer-friendly, ad-free PDF on Ravelry by clicking here.
In a hurry? Pin this for later when you have more time.
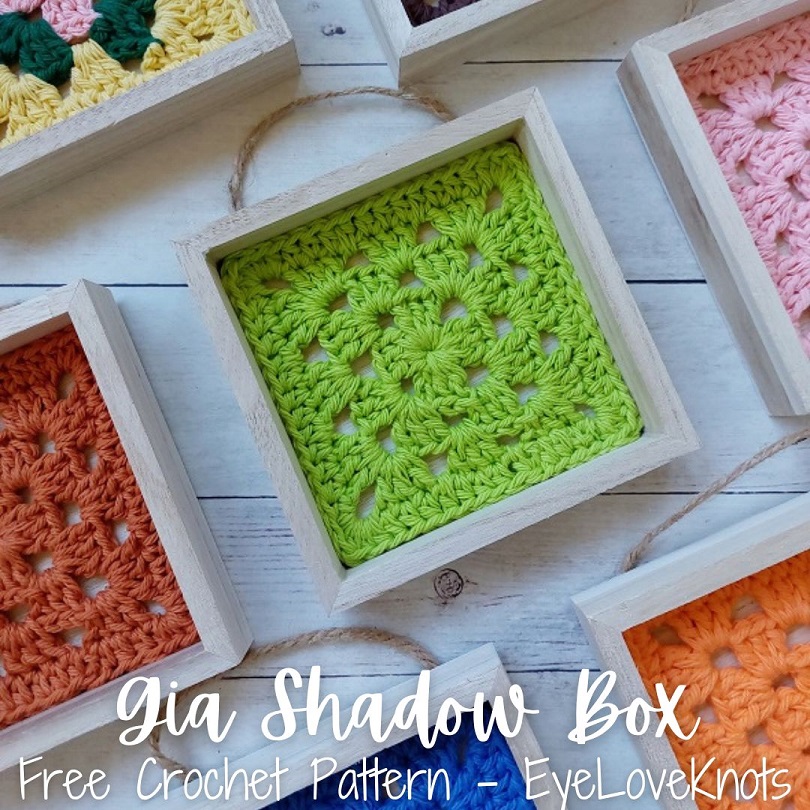
Formerly the Gwyneth Shadow Box, this pattern was renamed to the Gia Shadow Box, as part of my Gia series.
I have a bunch of cotton yarns that I don’t really use anymore. I had a huge stash when I switched to WeCrochet Dishie because it is colorfast, and the others are not. After some time, I pulled all the cottons out that I don’t use, and I set them aside thinking of doing a large giveaway as I do sometimes with the Win My Yarn Stash.
They sat in boxes for a couple of months until I found these cute little shadow boxes at Michaels, and it sparked the idea of a granny square shadow box.
There is something special about the classic, traditional granny square that always warms my heart! I love it worked in a solid color, color blocks, or stripes, and it’s so versatile being that you can stop at the end of any round, and you basically have a finished project that can then be used in so many different ways.
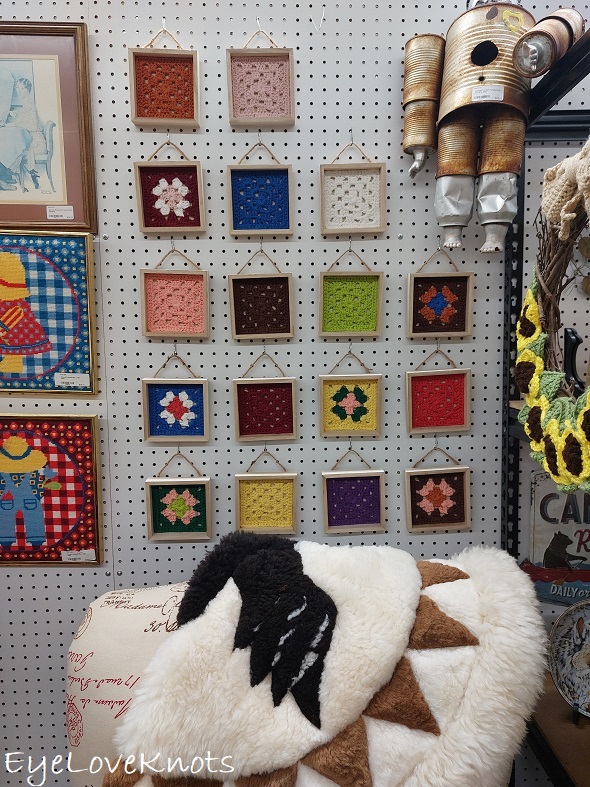
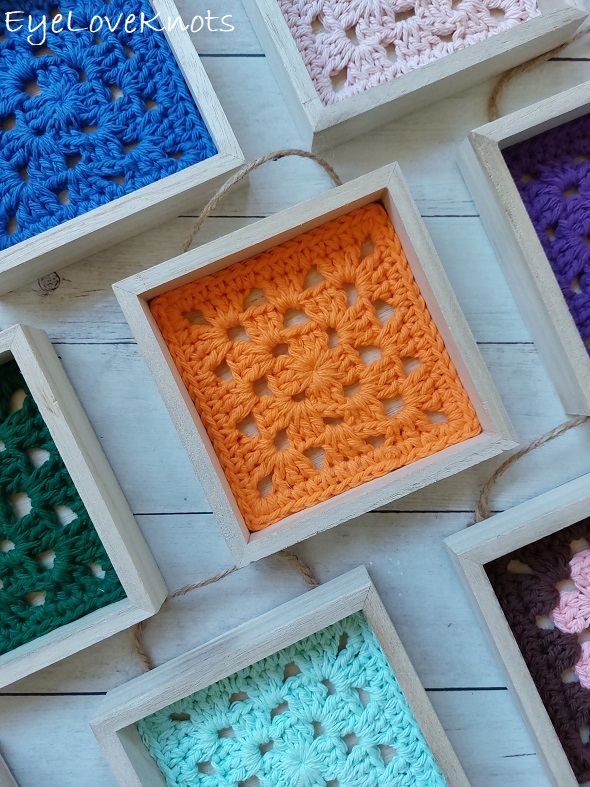
I am so in love with how these little boxes turned out, and how awesome they look hung gallery wall style – shown hung in my booth, Booth 122, at America’s Antique Mall in Melbourne, Florida. The stitch definition of the cotton yarn is lovely, plus it was a great way to use up my stash. I’ve been having so much fun, I haven’t stopped! This project is addicting.
Now, I have used Lily Sugar n Cream and Crafters Secret Cotton for my squares, which are both 100% cotton yarns, but you can use any worsted weight yarn from your stash – pick your favorite! Gauge isn’t terribly essential because you can just work until you get close, and then add a round of single or half double crochet to get closer, and with gluing into the box, you can stretch to make it fit – the beauty of crocheting from the center out! And being that you can stop after any round, you can easily change up your yarn to any weight, and just work more or less rounds.
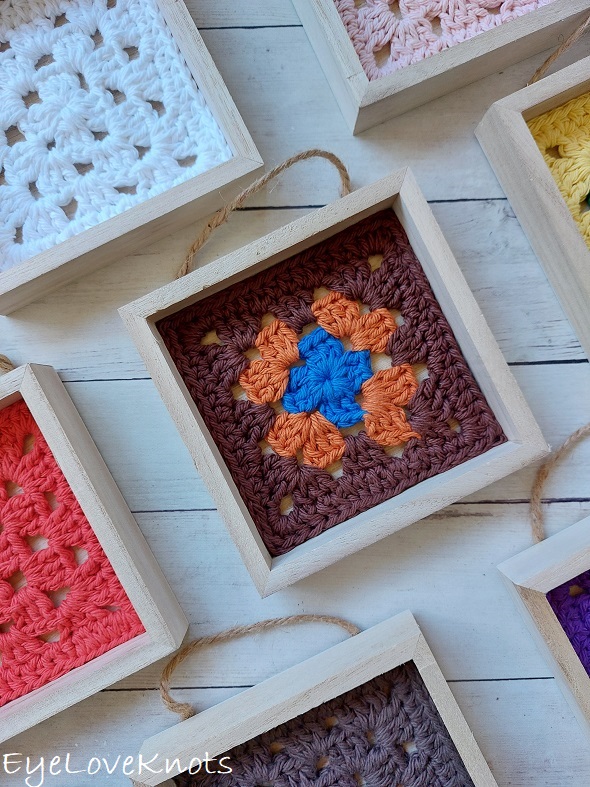
Do I Have to Add a Border to my Granny Square?
A border on your granny square is completely up to you! I choose to add a border to give me a little extra width and height because I wanted to keep to 3 rounds on the granny square. The beauty of this project is it looks great without a border, with a small border as I’ve done and with a thicker border. If you decide not to add a border, you can work additional rounds of the granny square pattern to add height and width if needed, or block the square.
If you would like to grab a free copy of the PDF for this pattern, make sure to check out the Pattern Notes section below.
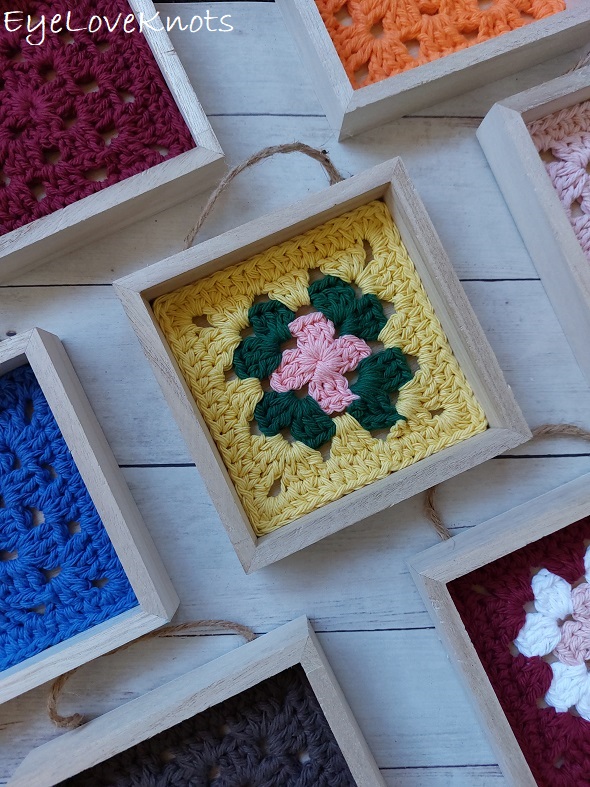
Ad-Free Printer Friendly PDF:

If you would like a PDF version of this post, you may get one through either my Etsy Shop, Ravelry Shop or LoveCrafts Shop for a small fee. This fee is to compensate for the views lost when you no longer need to return to the blog to for the information, as you will have your own copy. In a hurry? Pin this for later when you have more time!
Save this to your Favorites on (sub 06/24/23): AllFreeCrochet, Crochet Pattern Bonanza, DIYideaCenter, FaveCrafts, Cheap Thrifty Living, AllFreeHolidayCrafts, Free Crochet Tutorials, The Free Crochet Family, Indie Designers Free Crochet Pattern Directory
What Supplies Do I Need to Crochet a Granny Square Wall Hanging?
- 20 Yards of Worsted Weight #4 Yarn – I used a variety of colors of Lily Sugar n Cream & Crafters Secret Cotton
- H8/5mm Crochet Hook – I love this Koi Fish Ergonomic Clay one from SiennasBowtique on Etsy
- Soft Tape Measure
- Tapestry Needle to weave in ends
- Optional, Jewelry Pliers
- 5″ Wood Shadow Box – If you don’t want to have the twine hanger, you can pull it out with pliers.
- Glue – I used Titebond Quick & Thick for Multi-Surface
- Optional, Sandpaper to touch up shadow box
Material Notes:
I use an H8/5mm crochet hook for Lily Sugar n Cream and an I9/5.5mm crochet hook for WeCrochet Dishie & Crafters Secret Cotton (because they’re a little thinner). I use the yarn interchangeably, and just switch the hooks back and forth as I work.
Jewelry pliers are a great tool to use to help weave in ends, especially as cotton yarn can be quite tough on the fingers when weaving in with just fingers and a tapestry needle.
Let’s talk about glue. I did start my gluing process with E6000, as mentioned in the video tutorial and shown in the photo tutorial below. It’s a glue I like to use, but it’s recommended that you use a full face mask when working with it to protect your eyes and nose from the vapors. In the large tubes, it constantly oozes glue out, and the chemical odor is strong. The smaller tubes don’t ooze it out, and the smell is minimal, but I was only able to get about a square and a half glued down with the smaller tube, and they cost a bit more.
With about 30 squares to glue down, I went out to see if I could pick up a full face mask, and I wasn’t able to find one, but I did find a glue section, and this Titebond Quick & Thick for Multi Surface caught my attention. A quick Google search led me to some great reviews, and things like no odor, and safe to use, so I bought it to try out, and I really like it.
How Long Does It Take to Crochet a Granny Square Wall Hanging?
The granny square takes about 15-20 minutes, another 5 or so for gluing and then finishing touches so just under 30 minutes.
Measurements:
The shadow box is 5″, and when hanging from the twine, it measures about 6 1/2″ tall.
The inside of the box is 4 3/8″ wide, so you’ll want your granny square to be a little smaller than this to comfortably fit.
Gauge:
With Lily Sugar n Cream & an H8/5mm crochet hook, Round 3 = 3 3/4″ in diameter
Abbreviations (US Terms):
- DC – Double Crochet (Photo Tutorial)
- HDC – Half Double Crochet (Photo Tutorial)
- SC – Single Crochet (Photo Tutorial)
Pattern Notes:
Need help getting started? Check out my photo tutorial of How to Crochet a Granny Square.
If you would like to change colors to create stripes, I recommend fastening off after joining the round, and joining the new color over in the next corner chain space, unless you’ll be using the same color in the 3rd round – then I would carry.
Slip stitch join to the beginning chain 2.
Through 06/27/23 at 11:59pm EST, you can grab a free copy of the PDF for the Gwyneth Shadow Box on Ravelry using code FREECROCHET202311. I earn my income from the number of pageviews my blog sees, so please do not share the code, but instead share the link to this post so others can find it. Thank you!
If you’re viewing this after 06/27/23, you can still get a copy of the PDF on sale 50% off on Ravelry or on Etsy using code NEWCROCHET202309 until 07/02/23 at 11:59pm EST.
Gia Shadow Box, Video Tutorial:
Gia Shadow Box, Written Pattern:
Chain 5. Slip stitch join to form a ring. Chain 2, work 2 DC into the ring, (chain 3, 3 DC into the ring) 3x, chain 2. Join. (12 DC)
R2: Slip stitch into the next 2 DC, then into the next chain space. Chain 2, 2 DC, chain 3, 3 DC into the same chain space, chain 1, [(3 DC, chain 3, 3 DC) into the next chain space, chain 1] 3x. Join. (24 DC)
R3: Slip stitch into the next 2 DC, then into the next chain space. Chain 2, 2 DC, chain 3, 3 DC into the same chain space, chain 1, [(3 DC, chain 3, 3 DC) into the next chain space, chain 1, 3 DC into the next chain space, chain 1] 3x. Join. (36 DC)
Checkpoint:
Do you need a little extra width and height to get closer to the finished size of 4 3/8″? My 3 round square worked in Lily Sugar n Cream measured about 3 3/4″, so I added a round of single crochet, which adds about 1/2″. For squares worked in Crafters Secret Cotton, I added a round of half double crochet.
Single Crochet Border:
*This border is worked with a half double crochet as the 3rd stitch of the corner to make it more square and pop the corner out. For a more rounded corner, work 5 single crochets.
Chain 1. SC into the first stitch, and each of the next 2 DC, (2 SC, HDC, 2 SC) into the next corner chain space, [SC into each DC and each chain space across to the next corner chain space, (2 SC, HDC, 2 SC) into the next corner chain space] 3x, SC into each DC and each chain space across to the beginning. Join to the first SC.
Fasten off, and weave in ends.
Half Double Crochet Border:
*This border is worked with a double crochet as the 3rd stitch of the corner to make it more square and pop the corner out. For a more rounded corner, work 5 half double crochets.
Chain 1. HDC into the first stitch, and each of the next 2 DC, (2 HDC, DC, 2 HDC) into the next corner chain space, [HDC into each DC and each chain space across to the next corner chain space, (2 HDC, DC, 2 HDC) into the next corner chain space] 3x, HDC into each DC and each chain space across to the beginning. Join to the first HDC.
Fasten off, and weave in ends.
Glue Square into the Shadow Box:
I did not paint my shadow box. If you would like to stain or paint it, lightly sand, then stain or paint, and let dry, then proceed.
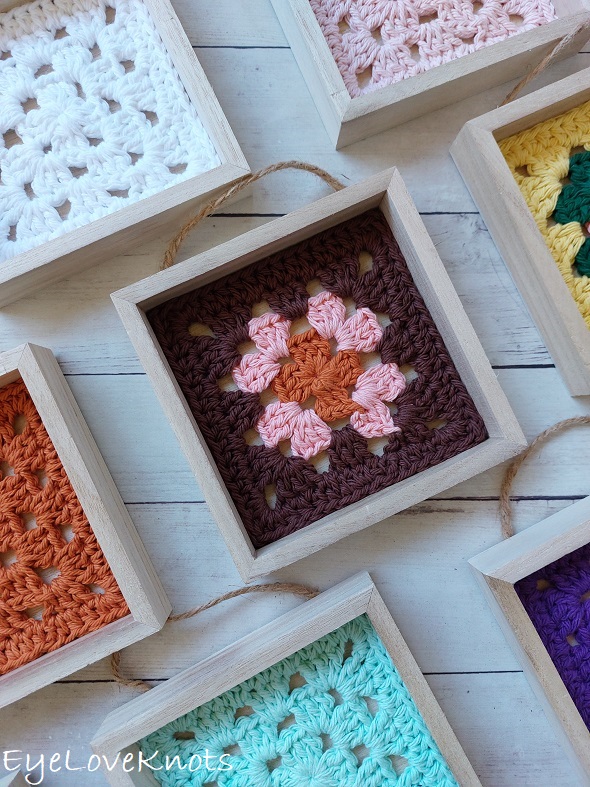
Lay the square into the box as you’d like it to sit. Work through a chain space or fold over the top part so you can get to the center of the square, and add a dab of glue around the center ring, then lay back down, situate to ensure it’s laying how you want still, and then press and hold. Working one corner at a time, fold over, and add glue following the curves of the corners as well as a dab in the outer middle cluster and above that on the border. Lay back down, get it situated pressing the square flat against the sides, and stretching out towards the corners to fit all the way to the edge, then press and hold. Work all the way around. Set aside to dry.
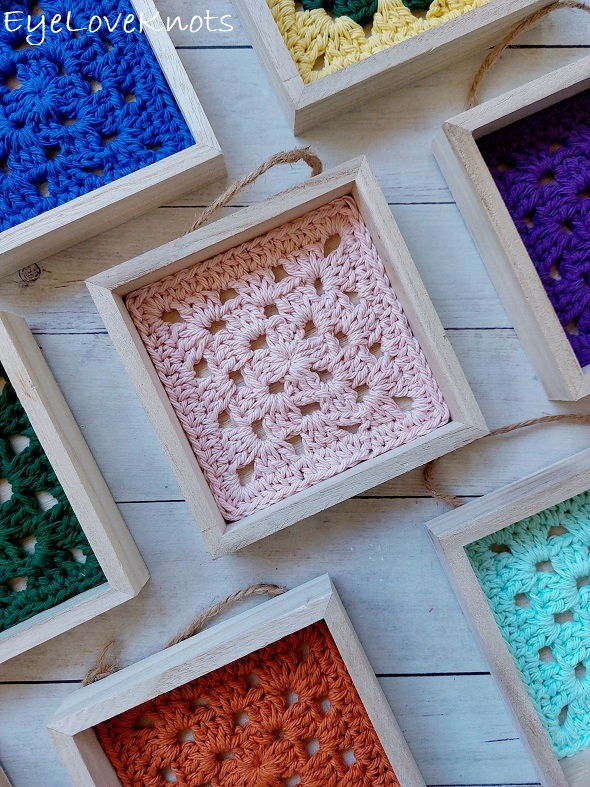
Glue Square into the Shadow Box, Photo Tutorial:
I did not paint my shadow box. If you would like to stain or paint it, lightly sand, then stain or paint, and let dry, then proceed.
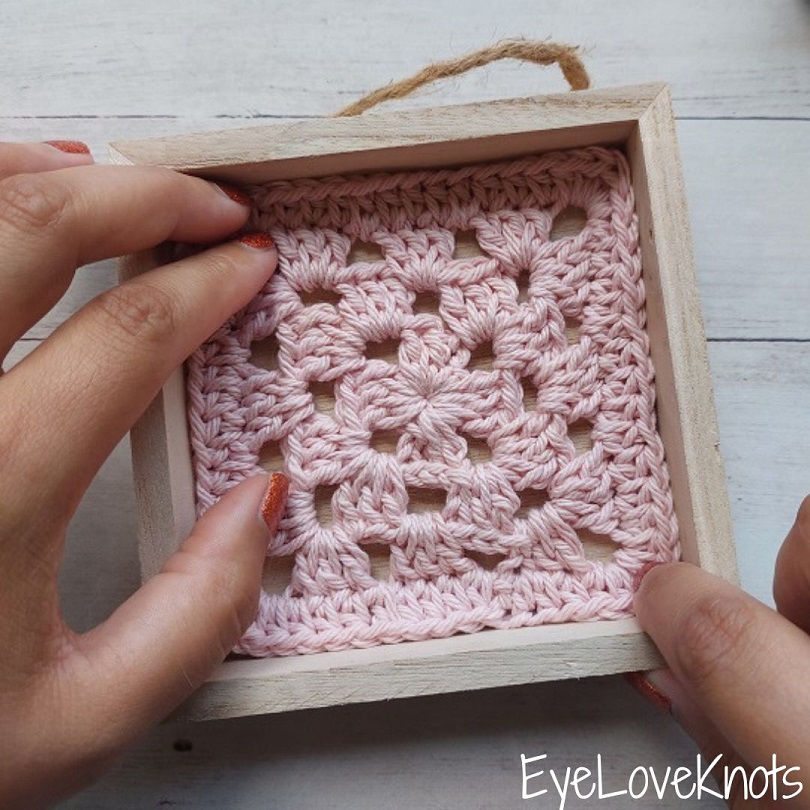
Lay the square into the box as you’d like it to sit.
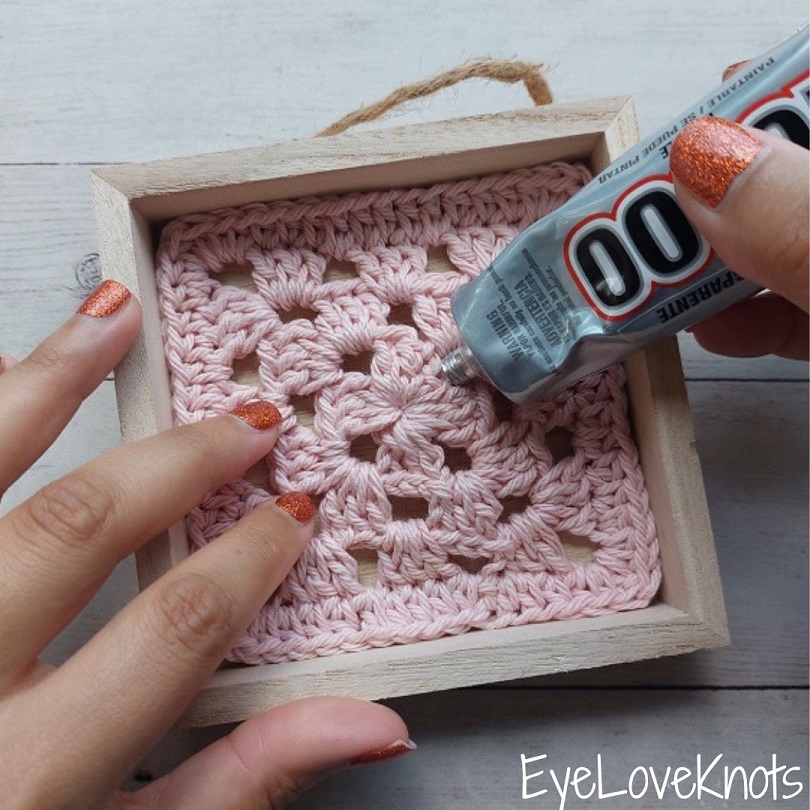
Work through a chain space or fold over the top part so you can get to the center of the square, and add a dab of glue around the center ring, then lay back down.
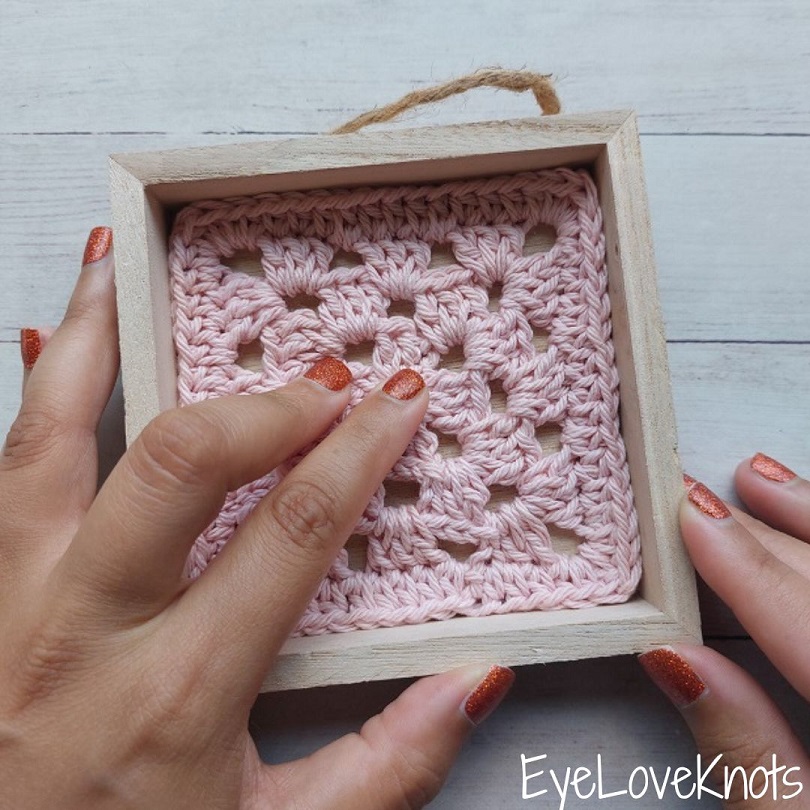
Situate to ensure it’s laying how you want still, and then press and hold.
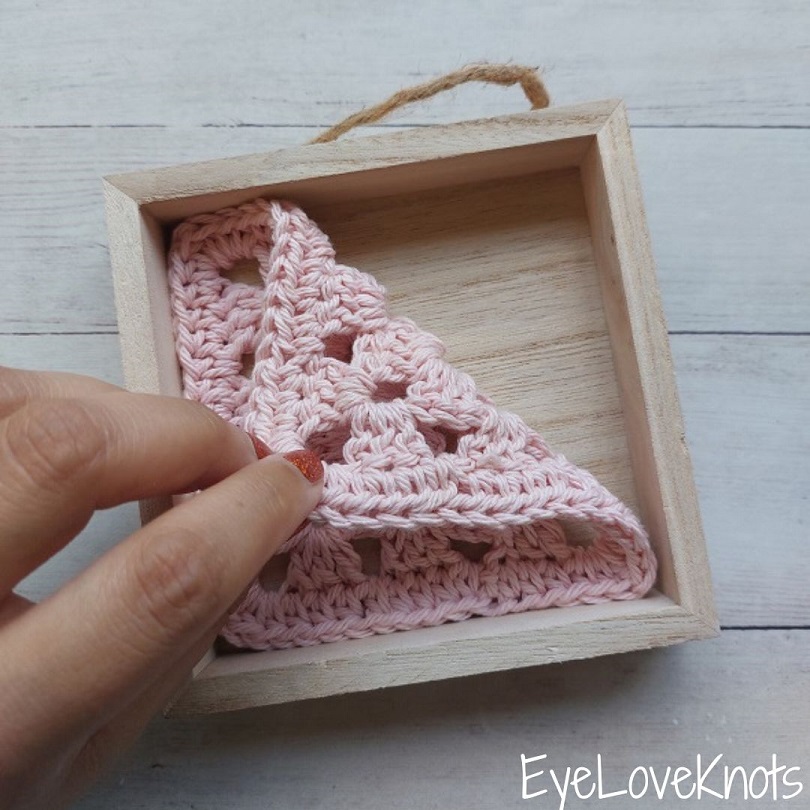
Working one corner at a time, fold over…
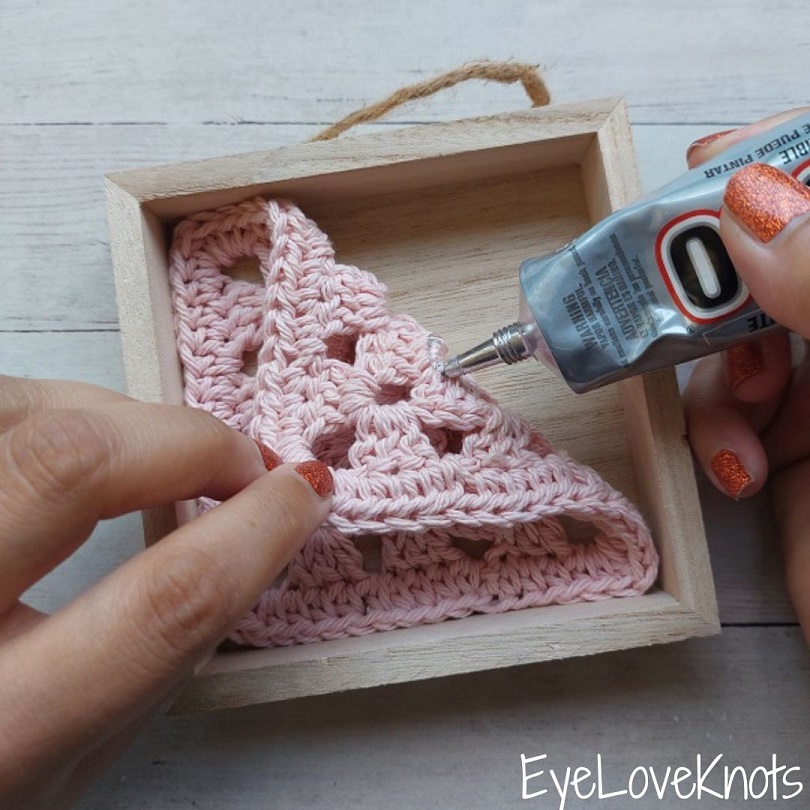
… and add glue following the curves of the corners as well as a dab in the outer middle cluster and above that on the border.
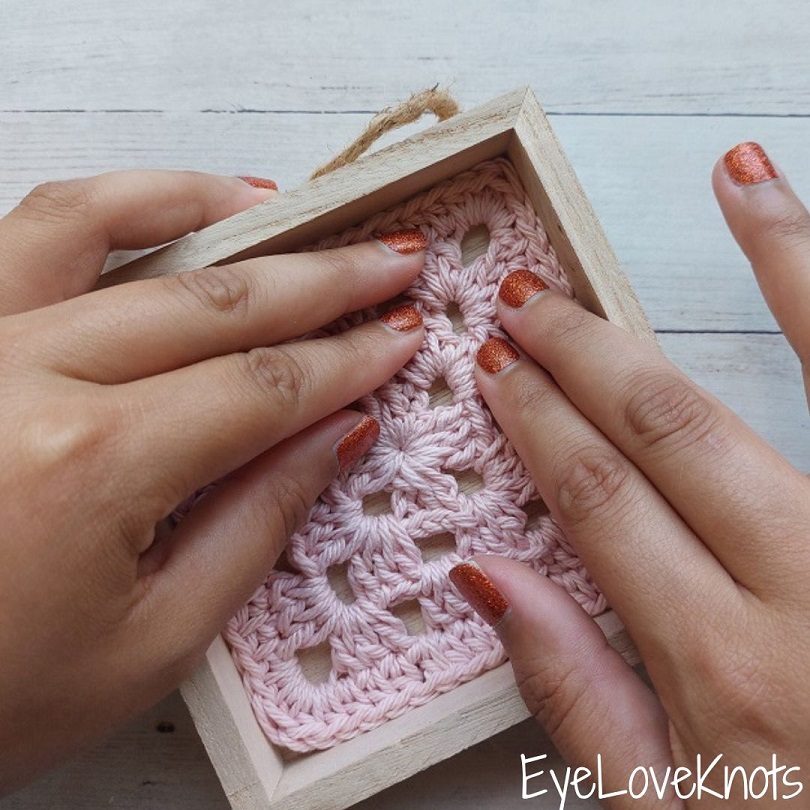
Lay back down, get it situated pressing the square flat against the sides, and stretching out towards the corners to fit all the way to the edge, then press and hold.
Work all the way around. Set aside to dry.
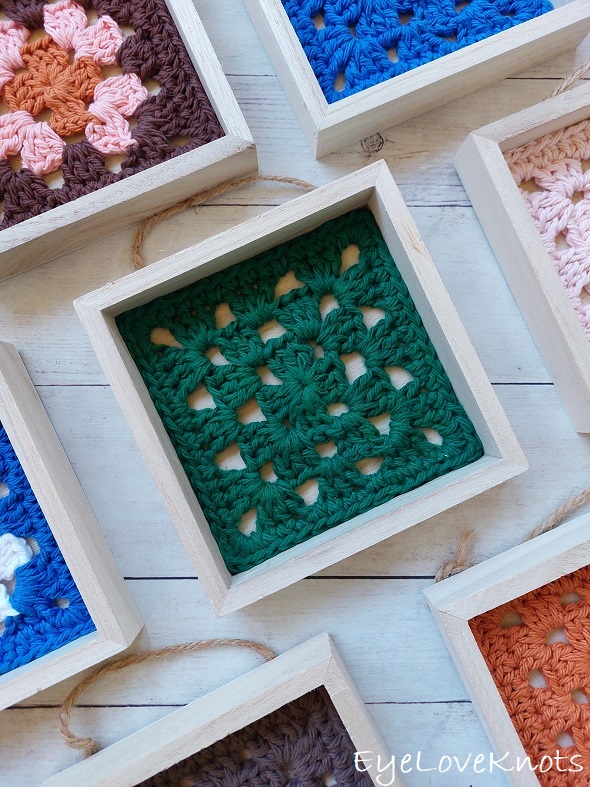
Finishing Touches:
If you’ve painted your shadow box, you’ve already done some light sanding, but if you left it in it’s natural state as I’ve done, lightly sand around the edges if needed.
Please feel free to make and sell your own items made using this pattern, but keep in mind, this written pattern and my photos are protected by copyright. Please DO NOT claim this pattern as your own nor should you sell my pattern. DO NOT re-publish my photos as your own. DO NOT copy and paste my pattern anywhere, link to it instead so other’s can visit. Making videos providing instructions how to make my projects on any social media platform is also not permitted.

Join one of our awesome Facebook groups to share your creations, and see what others are up to!
– Yarn Crafts & Coffee Community
– DIY Home On Rockwood Lane
– Alexandra Lane Lifestyle
Linked Up To…
Home Matters Linky Party #443 – Modern on Monticello
Tuesday Turn About #215 – My Wee Abode
Farmhouse Friday 313 – County Road 407
Craftastic Monday Link Party – Sew Can Do
Linky Ladies Party #239 – The Purple Poncho
Loop Scoop 68 – Moogly Blog
Wednesday Link Party 516 – Oombawka Design Crochet
Team Creative Crafts Link Party #159 – Artsy-Fartsy Mama
Saturday Sparks Link Party 578 – Pieced Pastimes
Creatively Crafty Link Party #395 – Try It – Like It – Create It
Sundays on Silverado #158 – The House on Silverado
Handmade Monday #377 – Sum of their Stories
The Really Crafty Link Party #378 – Keeping it Real
You’re the Star Blog Hop – Decor Craft Design
Happiness is Homemade 492 – Decor Craft Design
Anything Goes Link 389 – My Random Musings
Fabulous Party 488 – Lou Lou Girls
694th Inspire Me Tuesday – A Stroll Thru Life
The Happy Now Blog Link- Up #386 – JENerally Informed
Vintage Charm Party 401 – My Thrift Store Addiction
Wonderful Wednesday Blog Hop – My Life Abundant
To Grandma’s House We Go Link Party #361 – Grandma’s House DIY
Weekend Traffic Jam Reboot – Is This Mutton?
Create, Bake, Grow & Gather Party #585 – Shabby Art Boutique
Funtastic Friday #450 – Building Our Hive
Link Party #1 – Crazylittlelovebirds
A Morning Cup of Joe – The Cottage Market
Pink Saturday – How Sweet the Sounds
Encouraging Hearts and Home Blog Hop – My Slices of Life
Crafty Creators Link Party #81 – Life as a LEO Wife


Love these so much and can’t wait to make one…or ten!!
How mush did you sell these for?
I have them priced at $12 each. They aren’t selling as quickly as I thought they might with the trendy stitch pattern and colors, but have still sold a few so I’m happy.
I do love a granny square or two (or 20!) These look fabulous all together. What a great stashbuster.
Hehe! Yes! I love that this is a good project for scraps, and can be worked on little by little, though I did sit for several days, and work on nothing but granny squares to par down my stash. It was so fun, and a bit addicting.
These are so cute! Love how they turned out. Thank you for visiting and linking up over at Crazylittlelovebirds link party. 🙂
Thanks so much! Things have been a little hectic lately, but looking forward to joining you again soon!
Hola!
Has tenido una gran idea!!
Me gustan mucho tus creaciones.
BESOS
Does the yarn have to be cotton? Can I use acrylic or wool?
As mentioned in the post, “I have used Lily Sugar n Cream and Crafters Secret Cotton for my squares, but you can use any worsted weight yarn from your stash – pick your favorite!” Gauge can vary changing to a wool or acrylic from a cotton so if the finished size matters to you, you’ll want to either take gauge, or add/subtract rounds to get to your desired size.
That is such a lovely display!
Thanks so much, Joanne!
This is such a fab idea!!! Love them altogether on the wall
Thanks so much! I’ve had so much fun putting them all together.