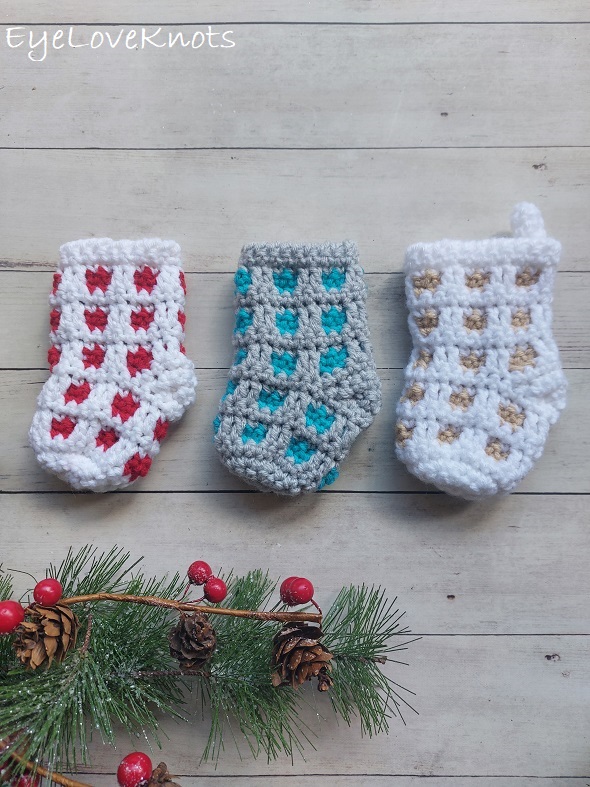
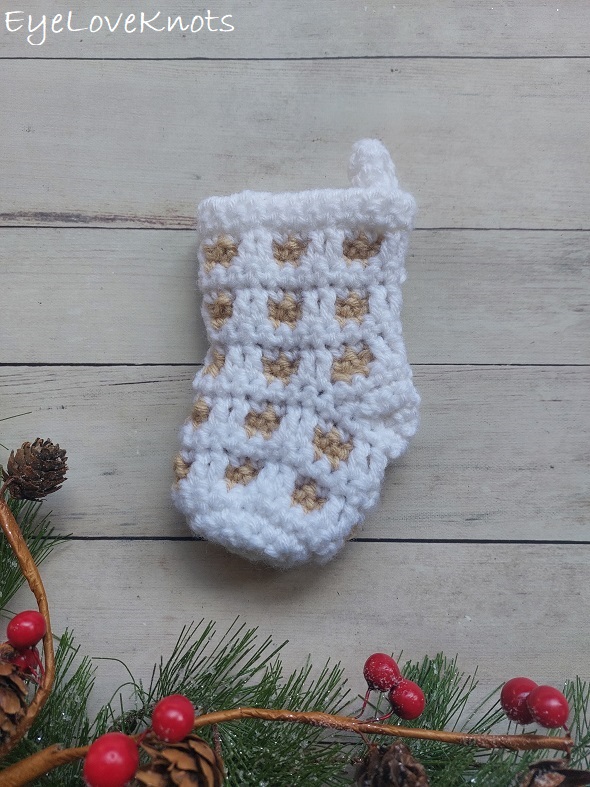
This is a free crochet pattern and video tutorial showing how to crochet the Through the Window Mini Stocking – a fun mini stocking pattern that uses the inset mosaic crochet technique.
This post contains affiliate links for Etsy and Amazon. If you make a purchase by clicking on them, I make a small commission at no extra cost to you. Thanks for your support!
Find the free crochet pattern instructions below, or purchase a printer-friendly, ad-free PDF on Ravelry by clicking here.
In a hurry? Pin this for later when you have more time.
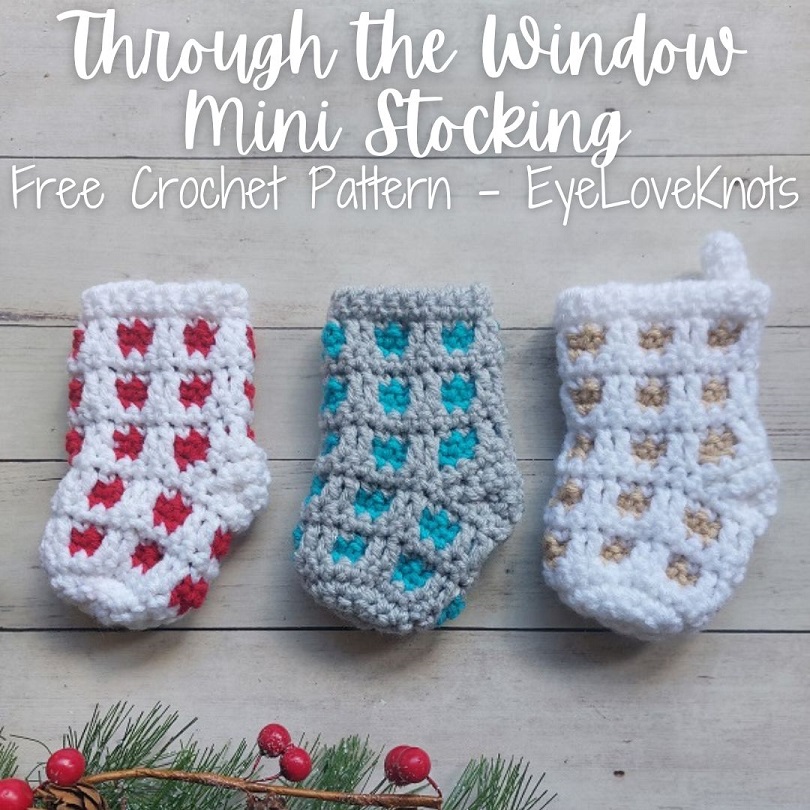
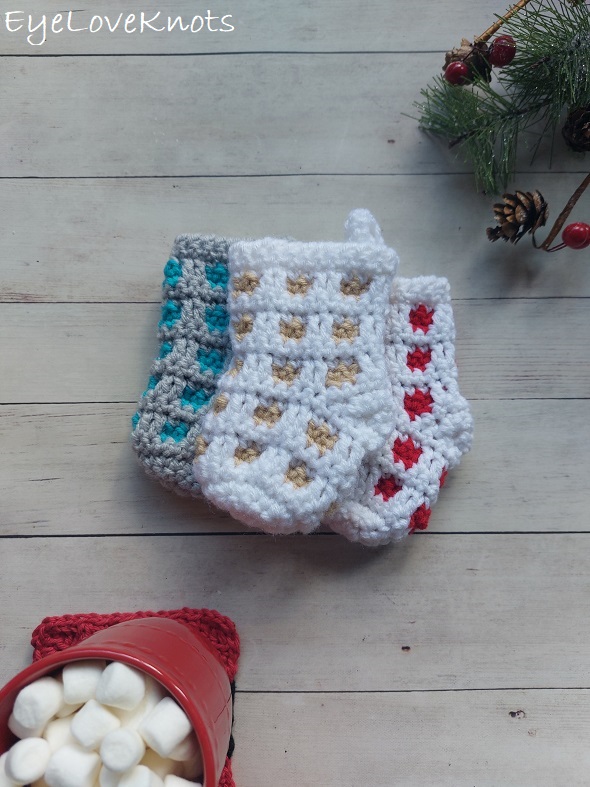
Our 5th and final project for Christmas in July 2023 is here! This fun mosaic crochet mini stocking is so versatile – hang it from your mantel or staircase in classic stocking form or hang it from your tree as an ornament, use it as a gift card holder or to house silverware on the Christmas table, make a bunch for an advent calendar and so much more!
Our 1st project was the Gia Ornament.

2nd was the Santa Cosmetic Bag or Hook Pouch.

3rd was the C2C Santa Coasters.

4th was the Buffalo Plaid Shay Earwarmer.
The idea of mosaic crochet may intimidate you, but please don’t let it. This stitch pattern is comprised of single crochets and chains with some double crochets to create the overlap. Most of the projects from my Through the Window series stop here, but this one does incorporate some single crochet decreases to help with the shaping. Still, I think a confident beginner could do this project, and there is a video tutorial to help along the way as well.

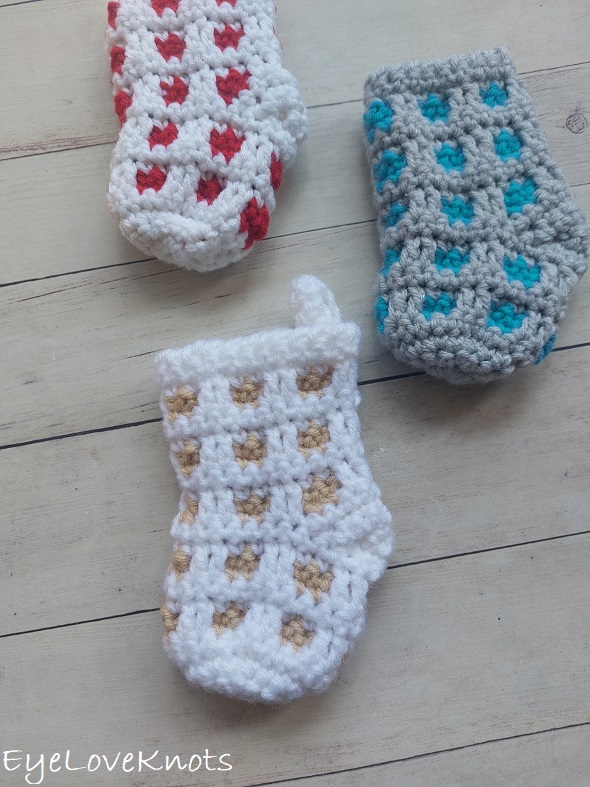
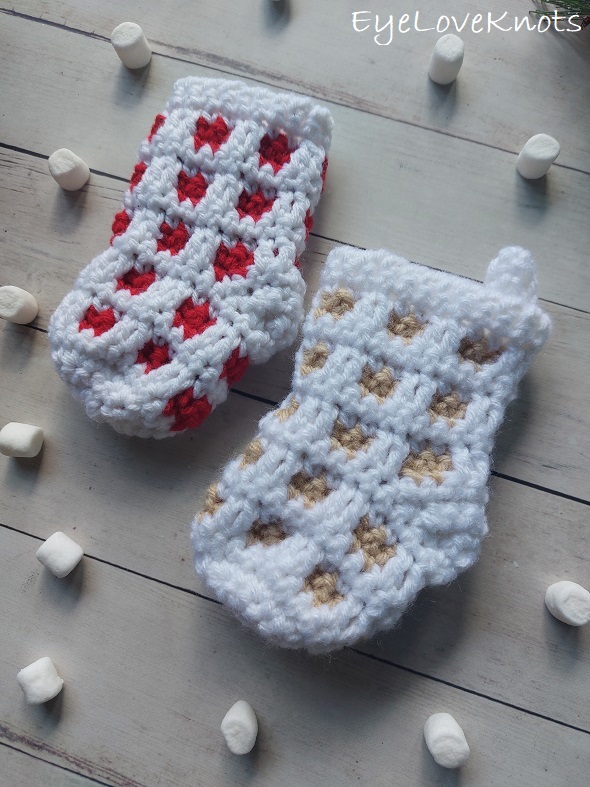
While my favorite way to work this technique is with a variegated color underneath, and a solid coordinating color on top, it also looks great with a two solids as I’ve done with mine or even just one color.
I’ve used Red Heart Super Saver for my mini stocking as I wanted to use yarn that I had in my stash already, plus it’s a nice, durable yarn, but you can use any worsted weight yarn from your stash. Gauge is not essential for this project. You could even go with a chunky weight yarn and respective size hook for a larger stocking.
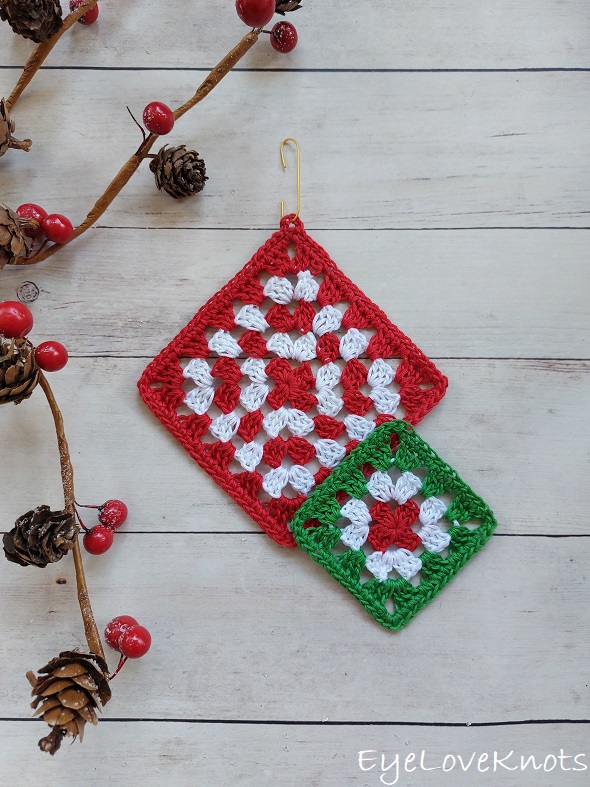
Make a matching Lightweight Through the Window Ornament to complete your set!
Behind the Scenes…

Cat tested and approved stockings!
Ad-Free, Printer Friendly PDF:

EyeLoveKnots newsletter subscribers get access to Exclusive Subscriber Content, like the free PDF of this pattern via the Free File Library – you’ll find the tab on the top menu. The library is password protected so sign up for my newsletter and you’ll receive a Welcome email containing this month’s password, or if you are already a blog subscriber, reference your latest newsletter for this month’s password. From the library, you’ll be able to access the PDFs via Google Drive – you do not need to have a Google Drive account to view and download the PDF.
If you would like a PDF version of this post, you may get one through either my Etsy Shop or Ravelry Shop for a small fee. This fee is to compensate for the views lost when you no longer need to return to the blog to for the information, as you will have your own copy. In a hurry? Pin this for later when you have more time!


Save this to Your Favorites On: AllFreeCrochet, FaveCrafts, Crochet Pattern Bonanza, Cheap Thrifty Living, DIYideaCenter, AllFreeHolidayCrafts, Free Crochet Tutorials
What Supplies Do I Need to Crochet a Mini Stocking?
- 50 Yards of Worsted Weight Yarn – I used Red Heart Super Saver in (White & Cherry Red), (White & Buff) and (Light Gray & Turqua); Respectively, it’s 30 Yards of the Main Color and 20 Yards of the Coordinating Color
- H8/5mm Crochet Hook
- Tapestry Needle
- Optional, Jewelry Pliers
Material Notes:
Similar Yarns to Red Heart Super Saver: Bernat Super Value and Caron One Pound
You can easily substitute out the yarn with your favorite worsted weight yarn, or really any weight yarn with the respective crochet hook. I worked up a mini stocking in Lion Brand 24/7 Cotton with a G6/4.25mm crochet hook. While it came out a little bit smaller, it’s still great for various uses, is super cute and a plus is the excellent stitch definition of 24/7 Cotton.
We have lots of great crochet hooks in our Yarn Crafts and Coffee Yarn Shop. The most popular, and preferred by Candace and Emily, are the Clover Amour Crochet Hooks with the soft handles and smooth metal hook. Alexandra prefers metal crochet hooks with large, ergonomic clay handles and just loves the fun designs from SiennasBowtique and BronzeShepherdStudio! If your preference is wood, the LYKKE brand are lovely, smooth and sturdy.
Jewelry Pliers are an excellent tool to use to help weave in the ends of tough yarns, such as cotton yarns and chunkier yarns, that can be quite tough on the fingers when weaving in with just fingers and a tapestry needle. Sore thumbs and frustration can be a thing of the past by simply using jewelry pliers to help pull the tapestry needle through the work. Make sure the eye of the needle is facing up so you can see directly down it and carefully pull, wiggling as needed. If it gets caught and you tug too hard, it will break the eye of your needle.
How Long Does it Take to Crochet a Mini Stocking?
Just under 45 minutes.
Measurements with Red Heart Super Saver & H8/5mm Crochet Hook:
- 3 3/8″ Wide across Body
- 3 1/2″ Wide across middle including Heel
- 5 3/4″ Tall not including Hanger
- 6 3/4″ Tall with Hanger
Measurements with Lion Brand 24/7 Cotton & G6/4.25mm Crochet Hook:
- 2 3/4″ Wide across Body
- 3″ Wide across middle including Heel
- 4 5/8″ Tall
Gauge (Not Essential) with Red Heart Super Saver & H8/5mm Crochet Hook:
At the end of Round 3 of 1st half, Diameter = 2 1/4″
Abbreviations (US Terms):
- SC – Single Crochet (Photo Tutorial)
- DC – Double Crochet (Photo Tutorial) – in this inset pattern it’s worked in front of the chains
Pattern Notes:
If you want to alter the width of the mini stocking, you’ll want to increase up to a number of stitches that is divisible by 4 for the mosaic stitch pattern to work out evenly. If you add rounds to the beginning, you may want to add rows to the Heel – this does change the stitch count so you may need to adjust Row 1 of the Body to account for Heel changes working towards a stitch count that is divisible by 4 as well.
If you want to alter the height of the mini stocking, add or subtract rows by 4 – this is the repeat.
Beginning chain does not count as a stitch.
Slip stitch join to the first stitch of the round.
I used solid colors for my mini stocking, but I really love to use this stitch pattern with a variegated yarn as my coordinating color – it is my favorite way to use variegated yarns! It also looks very nice in one solid color with the added texture.
The MC, or Main Color, is going to be the color you start your mini stocking with, and the color that shows on top as it’s also the same one the double crochets are worked in. The CC, or Coordinating Color, is going to be the color that you add in at the second row, and shows underneath to create the colored squares.
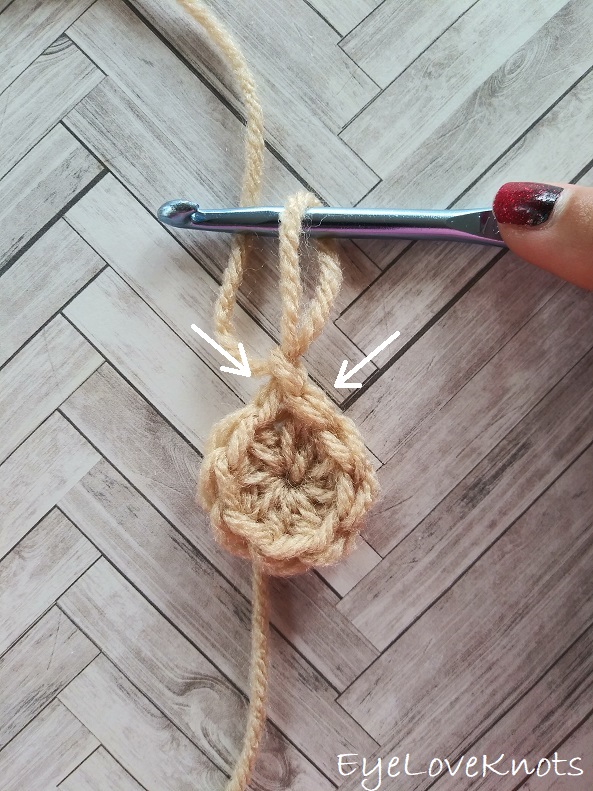
I work my increases differently than most to help keep my seam straight, and that is that the first stitch from the first set of increases is done in the first stitch of the round, which will appear just to left of the beginning chain, then the round will be worked as normal, and the final stitch of the round will be the second stitch of the first set of increases, and it will be worked into the same stitch as the first, and appear just to the right of the beginning chain. The photo above shows where the first and last stitch are worked, and I have a photo tutorial of this technique in my How to Keep a Straight Seam post. You can work in your preferred increase method as long as we end up with the same stitches at the end of the round.
To change yarn colors, after joining, turn to the new working side. Pull the new color through, then pull the original color tight (it will disappear). Work the round as written, but before joining, move the previous color to the inside so it won’t be visible from the right side of the ornament. Your previous color will be carried up the center seam on the inside of the stocking.
Weave in as you go as this is the easiest time to reach many of the spots.
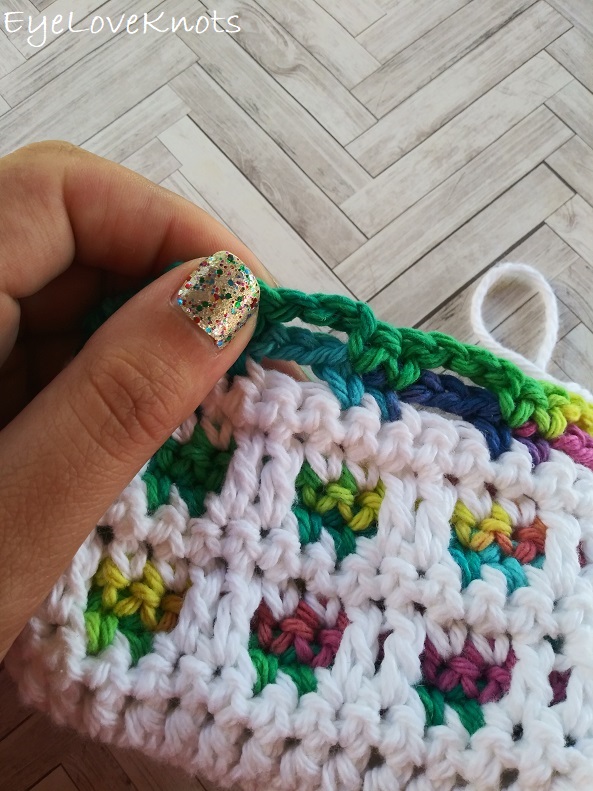
In the pattern, I will instruct to example, in Row 7 of the first half “DC into R5”. In the photo above, you can see how there is a skipped stitch in white, and two rows of chains above it. You will push those chains to the back, and work the double crochet just into that skipped stitch in white. Shown on my Through the Window Soap Cozy or Small Bag.
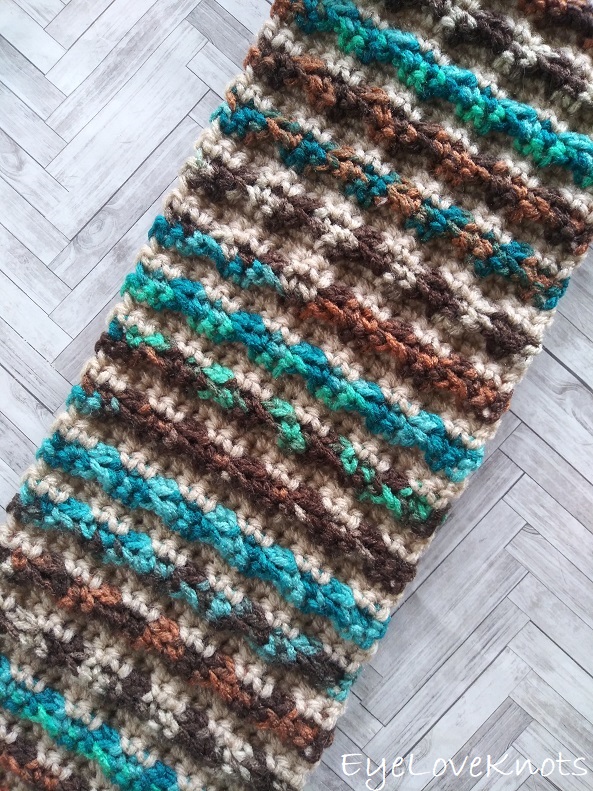
This is what the back looks like, also shown on my Through the Window Scarf.

Through 08/05/23 at 11:59pm EST, you can grab a free copy of the PDF for the Through the Window Mini Stocking on Ravelry using code FREECROCHET202316. I earn my income from the number of pageviews my blog sees, so please do not share the code, but instead share the link to this post so others can find it. Thank you!
If you’re viewing this after 08/05/23, you can still get a copy of the PDF on sale 50% off on Ravelry or on Etsy using code NEWCROCHET202315 until 08/13/23 at 11:59pm EST.
Through the Window Mini Stocking, Video Tutorial:
Through the Window Mini Stocking, Written Pattern:
Crown of the Toe up to Heel:
In MC, chain 4. Slip stitch join to form a ring. Chain 1. Work 8 SC into the center ring. Slip stitch join. (8 SC)
R2: Chain 2. Work 1 DC into the first stitch, 2 DC in each of the next 7 DCs, and 1 DC into the last stitch. Join. (16 DC)
R3: Chain 2. Work 1 DC into the first two stitches, (2 DC into the next stitch, 1 DC into the next stitch) 7x, 1 DC into the last stitch. Join. (24 DC)
R4: Chain 1, turn. SC into the 1st SC, and each SC around. Join. Turn & switch to CC.
R5: In CC, chain 1. SC into the 1st SC, chain 2, skip the next 2 SC, (SC into each of the next 2 SC, chain 2, skip the next 2 SC) 5x, SC into the last SC. Join.
R6: Chain 1, turn. SC into the 1st SC, chain 2, skip the next chain space, (SC into each of the next 2 SC, chain 2, skip the next chain space) 5x, SC into the last SC. Turn & switch to MC.
R7: In MC, chain 1. SC into the 1st SC, DC into each of the 2 open stitches from R5, (SC into each of the next 2 SC, DC into each of the next 2 stitches of R5) 5x, SC into the last SC. Join.
R8: Chain 1, turn. SC into the 1st SC, and each SC around. Turn & switch to CC.
R9 – 12: Repeat Rows 5 – 8 one more time fastening off CC at the end instead of switching to it. Heel will be worked in MC.
Heel of Mini Stocking:
R1: In MC, chain 1, and turn. SC into the 1st 3 stitches. (3 SC)
R2: Chain 1, turn. SC into the 1st 3 SC, SC into the next stitch of R12 that the beginning chain of R1 is coming out from, slip stitch into the next stitch.
R3: Chain 1, turn. Skip the slip stitch, SC into each of the next 4 SC, SC into the next stitch of R12 where the last SC of R1 is worked, slip stitch into the next stitch.
R4: Chain 1, turn. Skip the slip stitch, SC into each of the next 5 SC, SC into the same stitch as the last slip stitch of R2, slip stitch into the next stitch.
R5: Chain 1, turn. Skip the slip stitch, SC into each of the next 6 SC, SC into the same stitch as the last slip stitch of R3, slip stitch into the next stitch.
R6: Chain 1, turn. Skip the slip stitch, SC into each of the next 7 SC, SC into the same stitch as the last slip stitch of R4, slip stitch into the next stitch. Re-attach CC.
Body of Mini Stocking:
R1: In CC, chain 1 and turn. SC into the same stitch as the slip stitch, chain 2, skip the next 2 SC [of the heel], SC into each of the next 2 SC, chain 2, skip the next 2 SC, SC into each of the next 2 SC [last 2 of the heel], chain 2, skip the next 2 SC [lines up with the box from below], chain 2, skip the next 2 SC, SC2tog, chain 2, skip the next 2 SC, SC into each of the next 2 SC, chain 2, skip the next 2 SC, SC2tog over the last stitch and the same stitch as the first [otherwise there will be a gap between the 1st and last stitches of the round]. Join.
R2: Chain 1, turn. SC into the 1st SC, chain 2, skip the next chain space, SC into each of the next 2 SC, chain 2, skip the next chain space, SC into the next SC [which is the decrease from the previous round], chain 2, skip the next chain space, (SC into each of the next 2 SC, chain 2, skip the next chain space) 3x, SC into the last SC. Turn & switch to MC.
R3: In MC, chain 1. SC into the 1st SC, DC into each of the 2 open stitches from R1, (SC into each of the next 2 SC, DC into each of the next 2 stitches of R1) 3x, SC into the next SC, DC into each of the next 2 stitches of R1, SC into each of the next 2 SC, DC into each of the next 2 stitches of R1, SC into the last SC. Join.
R4: Chain 1, turn. SC into the 1st 7 SC, 2 SC into the next SC, SC into the next 15 SC around. Turn & switch to CC.
R5: In CC, chain 1. SC into the 1st SC, chain 2, skip the next 2 SC, (SC into each of the next 2 SC, chain 2, skip the next 2 SC) 5x, SC into the last SC. Join.
R6: Chain 1, turn. SC into the 1st SC, chain 2, skip the next chain space, (SC into each of the next 2 SC, chain 2, skip the next chain space) 5x, SC into the last SC. Turn & switch to MC.
R7: In MC, chain 1. SC into the 1st SC, DC into each of the 2 open stitches from R5, (SC into each of the next 2 SC, DC into each of the next 2 stitches of R5) 5x, SC into the last SC. Join.
R8: Chain 1, turn. SC into the 1st SC, and each SC around. Turn & switch to CC.
R9 – 12: Repeat Rows 5 – 8 one more time fastening off CC at the end instead of switching to it.
R13, Optional: Chain 1, turn. Reverse SC into each stitch around. Join (I like to fasten off, and join with tapestry needle).
Fasten off, and weave in remaining ends.
Hanger (Optional):
Chain 11. SC into the 2nd chain, and each chain across. (10 SC)
Fasten off with longer tail for sewing.
Weave in initial tail end.
Thread longer tail end into tapestry needle. Flatten stocking to crease the point at the top right side of opening that is just above the heel. Grab stocking, and pop open. Form a “U” shape with the hanger, and place the ends of the hanger inside the stocking even with the bottom of Round 11, just above where the coordinating color meets it – I did so with the tail end side to the left of the crease, and the other to the right of the crease. Whipstitch in place along the inside stitches of Round 11 – do not work your needle all the way through to see the needle come from the right side of the stocking, just work through the top layer on the wrong side of the stocking. Whipstitch all the way across covering both ends, then whipstitch back across. Weave in into the bulkiness of the seam, and then fasten off.
Please feel free to make and sell your own items made using this pattern, but keep in mind, this written pattern and my photos are protected by copyright. Please DO NOT claim this pattern as your own nor should you sell my pattern. DO NOT re-publish my photos as your own. DO NOT copy and paste my pattern anywhere, link to it instead so other’s can visit. Making videos providing instructions how to make my projects on any social media platform is also not permitted.
Join one of our awesome Facebook groups to share your creations, and see what others are up to!
– Yarn Crafts & Coffee Community
– DIY Home On Rockwood Lane
– Alexandra Lane Lifestyle
Linked Up To…
Leave a Reply