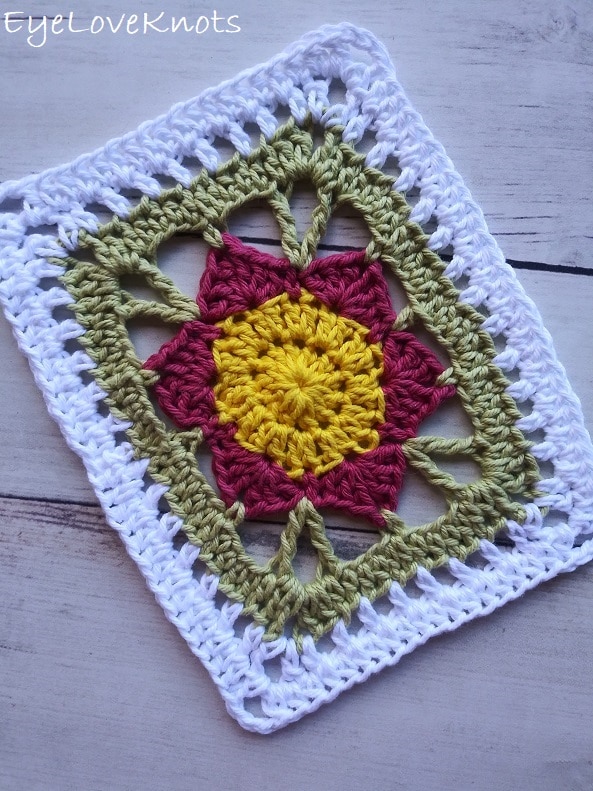
This is a free crochet pattern for how to crochet a quick and easy floral doily. It’s worked in a small amount of yarn making it perfect for those scraps in your stash!
This post contains affiliate links for WeCrochet, Lion Brand, Etsy and Amazon. If you make a purchase by clicking on them, I make a small commission at no extra cost to you. Thanks for your support!
Find the free crochet pattern instructions below, or purchase a printer-friendly, ad-free PDF on Ravelry by clicking here.
In a hurry? Pin this for later when you have more time.
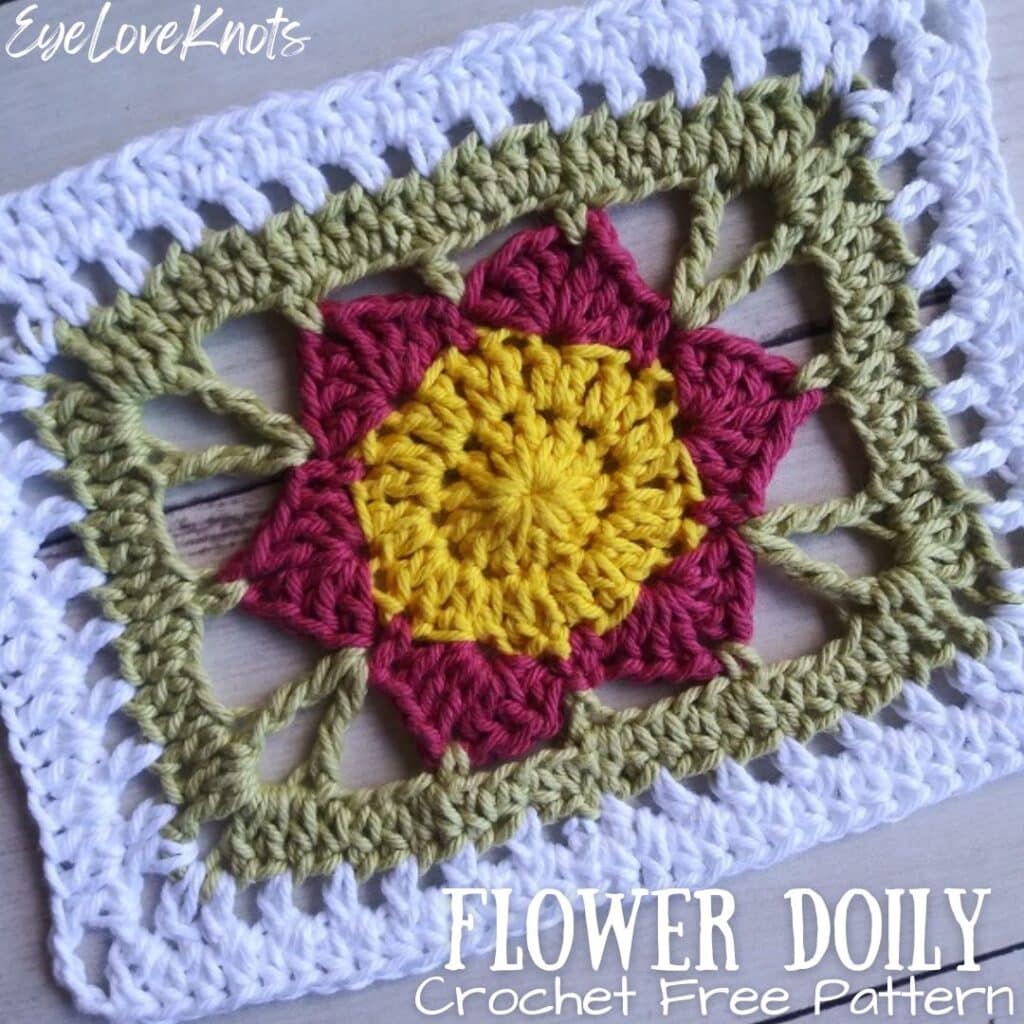
Crochet a beautiful, lacy, floral doily that’s perfect for scraps and works up quickly. It’s so easy to adjust if you want to make it larger, or make a bunch and sew together for endless projects.
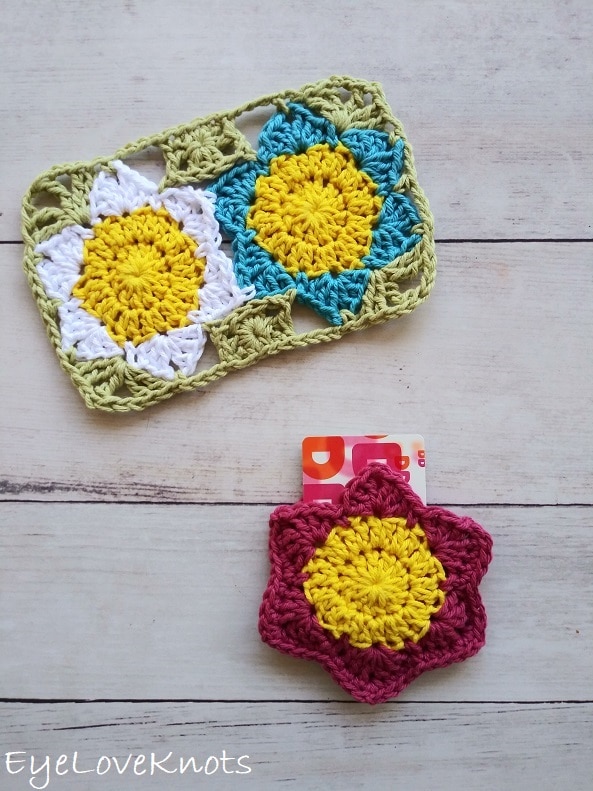
I originally designed this crochet flower gift card holder for April Showers Bring May Flowers 2021!
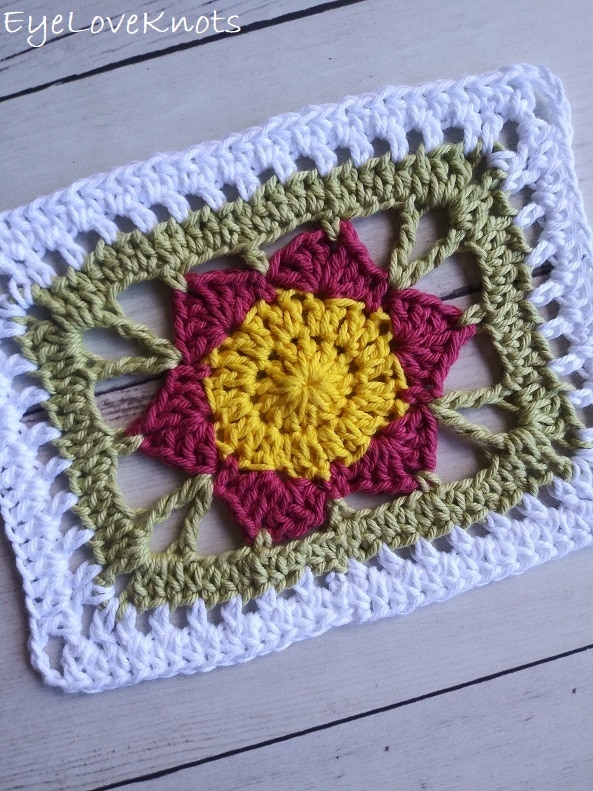
The goal with this doily was actually a square because I wanted to make a table runner with them. Because the flower is not equal widthwise and lengthwise, it ended up being a rectangle. At first, I was a little bummed, but then I started thinking about it, and it can still just as easily be worked up into a table runner by making many and sewing them together! And it makes a really lovely doily that can easily be made larger by repeating the last two rows.
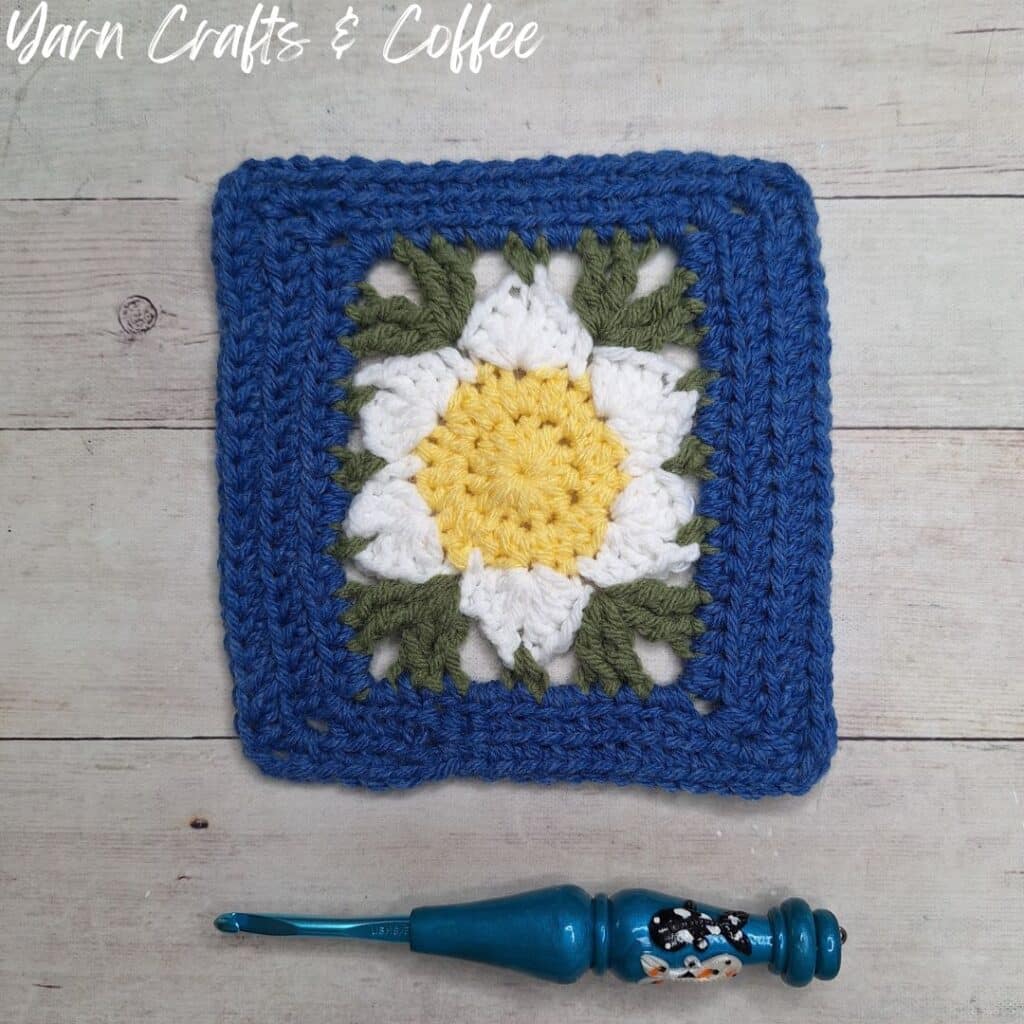
If you would like to turn it into a square, check out my Delilah Afghan Square over on my Yarn Crafts & Coffee blog.
Some alternate ideas for this rectangle:
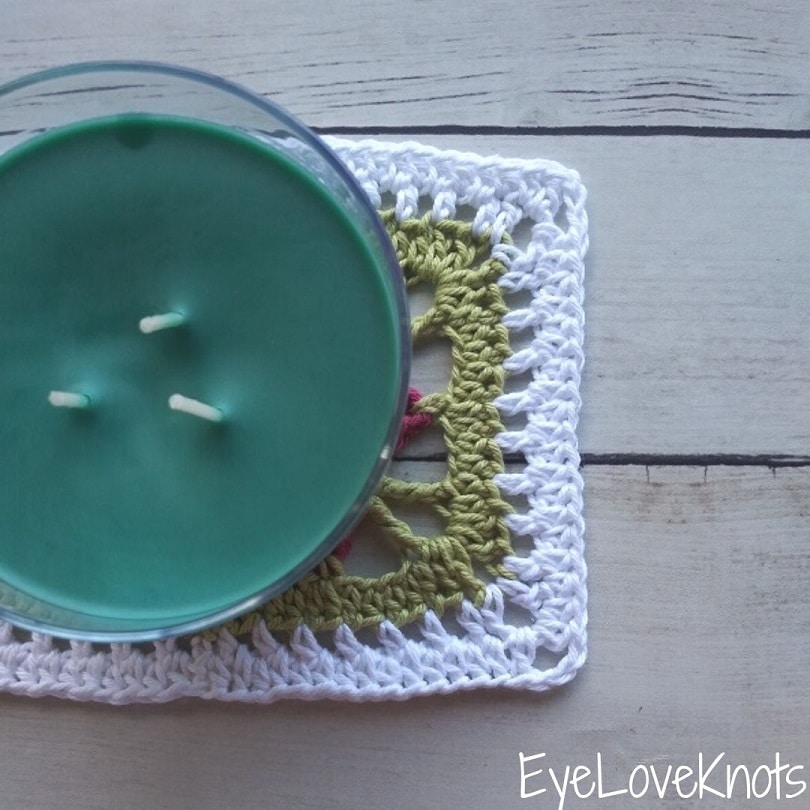
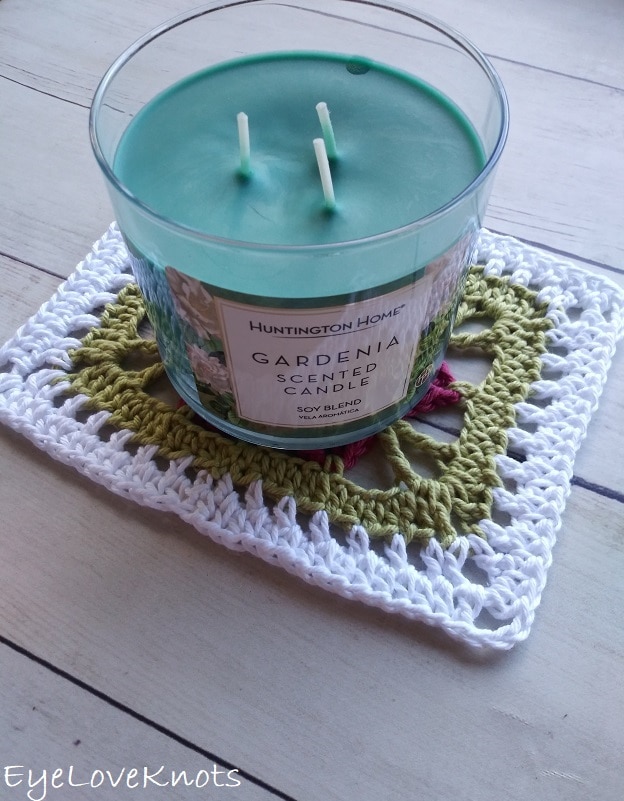
- Make 1 in cotton yarn for a doily or oversized coaster
- Make 1 in any fiber for a wall hanging
- Make several and sew together to create a tote bag, rug, blanket and so much more
- Experiment with different weight yarns to get different sizes for endless possibilities!

You May Also Like These:
Seems I’m just addicted to this cute crochet flower motif in the Spring!
You may enjoy some of these other fun, free crochet patterns in the Delilah Series:
Delilah Mug Rug and Delilah Gift Card Holder
Delilah Table Runner & Delilah Wall Hanging
Spring Fling Crochet Event 2025
I’m hosting the Spring Fling Crochet Event from April 16th, 2025 through April 22nd, 2025, in which I’m sharing 7 crochet flower idea crocheted with this easy crochet floral motif, and you can add each one to your Ravelry library for free as well (see the Ad-Free, Printed Friendly PDF section below). Make sure to check out the schedule and check out the supply list for the event.
Ad-Free, Printer Friendly PDF:

EyeLoveKnots newsletter subscribers get access to Exclusive Subscriber Content, like the free PDF of this pattern via the Free File Library – you’ll find the tab on the top menu. The library is password protected so sign up for my newsletter and you’ll receive a Welcome email containing this month’s password, or if you are already a blog subscriber, reference your latest newsletter for this month’s password. From the library, you’ll be able to access the PDFs via Google Drive – you do not need to have a Google Drive account to view and download the PDF.
For a Limited Time…
Through 04/21/25 at 9:00am EST, you can grab a free copy of the PDF for the Delilah Rectangle Doily on Ravelry using code CARROTCAKE25. I earn my income from the number of pageviews my blog sees, so please do not share the code, but instead share the link to this post so others can find it. Thank you!
After 04/21/25 or for non-subscribers, if you would like a PDF version of this post, you may get one through either my Etsy Shop, Ravelry Shop or LoveCrafts Shop for a small fee. This fee is to compensate for the views lost when you no longer need to return to the blog to for the information, as you will have your own copy.
In a hurry? Pin this for later when you have more time!
Save this to your Favorites on (sub 05.15): AllFreeCrochet, FaveCrafts, Cheap Thrifty Living, AllFreeHolidayCrafts, DIYideaCenter and Crochet Pattern Bonanza
Materials:
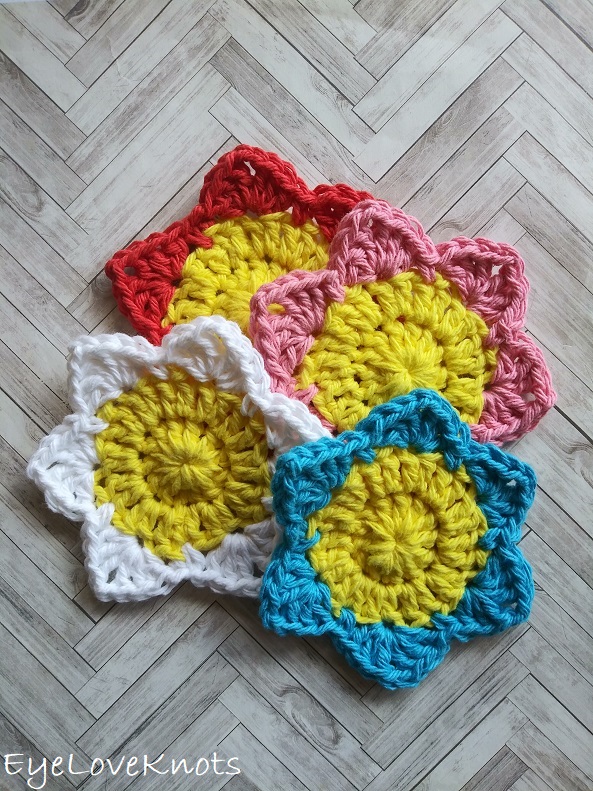
- 35 Yards Total of Worsted Weight Yarn – I used WeCrochet Dishie in Bumblebee (Flower Center, 6 yards), Begonia (Petals, 6 yards), Honeydew (Leaves, 4 yards) and White (19 yards).
- H8/5mm Crochet Hook
- Tapestry Needle for Weaving in Ends
- Optional, Jewelry Pliers
Material Notes:
Depending on the project you’ll be working with this rectangle, the yarn options can vary, but they’re practically endless. Feel to use your favorite worsted weight yarn, but I’ll provide some ideas for a couple projects:
For things like an afghan, scarf and shawl, acrylic yarn, like the Lion Brand Pound of Love I used in my video, is a good choice. For a cozier option, go with a wool blend, like Lion Brand Wool Ease or Cascade Pacific. For a warm weather option, a cotton blend, like Berroco Modern Cotton or Lion Brand Made with Love are great choices.
For things like a tote bag, washcloth or table runner, a 100% cotton yarn, like Circulo Natural Cotton Maxcolor 4/6, WeCrochet Dishie, Queensland Coastal Cotton or Lion Brand 24/7 Cotton is what I would recommend. These are nice, durable options that wear and machine wash well and are also colorfast (not all cotton yarns are).
Cotton yarn will appear thinner and have more definition than acrylic so it’s possible a worsted weight acrylic yarn would produce a slightly smaller doily so you may want to go up a hook size.
We have lots of great crochet hooks in our Yarn Crafts and Coffee Yarn Shop. The most popular, and preferred by Candace and Emily, are the Clover Amour Crochet Hooks with the soft handles and smooth metal hook. Alexandra prefers metal crochet hooks with large, ergonomic clay handles and just loves the fun designs from SiennasBowtique and BronzeShepherdStudio! If your preference is wood, the LYKKE brand are lovely, smooth and sturdy.
Jewelry Pliers are an excellent tool to use to help weave in the ends of tough yarns, such as cotton yarns and chunkier yarns, that can be quite tough on the fingers when weaving in with just fingers and a tapestry needle. Sore thumbs and frustration can be a thing of the past by simply using jewelry pliers to help pull the tapestry needle through the work. Make sure the eye of the needle is facing up so you can see directly down it and carefully pull, wiggling as needed. If it gets caught and you tug too hard, it will break the eye of your needle.
Time Spent:
- Flower: Just over 15 minutes each.
- Doily: About an hour.
Measurements:
The flower measurement is taken from the position of one petal at the top center. Petal to petal is measured from the tip of a top petal directly across to the tip of a bottom petal. Width is measured from the left edge of the left side petals directly across to the right edge of the right side petals.
- In Cotton: Flower: 4 1/8” Petal to Petal by 3 5/8” Wide; Doily: 7 1/2” Wide by 6 1/4” Tall
- In Acrylic: Flower: 3 7/8” Petal to Petal by 3 1/2” Wide; Doily: 7 1/4” Wide by 6” Tall
Gauge – Not Essential:
Measured after Round 2 aka the Center of the Flower, measure the diameter.
- In Cotton Yarn = 2 1/2”
- In Acrylic Yarn = 2 1/4”
Abbreviations (US Terms):
- SC – Single Crochet (Photo Tutorial)
- DC – Double Crochet (Photo Tutorial)
- HDC – Half Double Crochet (Photo Tutorial)
- TC – Treble/Triple Crochet (Yarn over twice initially, and yarn over and pull through an extra time)
Pattern Notes:
Beginning chain does not count as a stitch.
Join to the first stitch of the round, not the beginning chain.
How I worked my yarn color change: after joining, turn to the new working side. Pull the new color through, then pull the original color tight (it will disappear).
You can also work in the more traditional ways of pulling new color through in the last yarn over of the previous stitch (I do have a basic photo tutorial if needed – How to Change Yarn Colors in Crochet) or fastening off the center color, and rejoining the new color in any stitch, but I find the way I did it much easier, and it hides the color change.
I work my increases a little different than most, and that is that the first stitch from the first set of increases is done in the first stitch of the round, which will appear just to left of the beginning chain, then the round will be worked as normal, and the final stitch of the round will be the second stitch of the first set of increases, and it will be worked into the same stitch as the first, and appear just to the right of the beginning chain. You can see a photo tutorial of this in my How to Keep a Straight Seam post.
Though there are only three rounds in the flower, and a straight seam isn’t really an issue, this is my preferred method – you can work in your preferred increase method for the center as long as you end up with 24 stitches.
Invisible join is recommended to use at the end. I have a photo tutorial -> How to Make an Invisible Join. I did not do this join, and I’m kicking myself a bit because the join is noticeable as it pulls the fabric. An invisible join will look seamless.
When working rounds 5 and 7, you may opt to crochet directly into the chain itself (this is how I worked round 5 for a defined little ridge) or into the chain space itself (this is how I worked round 7 – make sure to work 1 stitch per chain).
If you would like your doily to be larger, you can simply repeat the last two rounds increasing the number of stitches as you go. The shaping works itself out by then so you can keep the corner stitches as half double crochets, the same as the rest of the stitches, and either a chain 2 for a more rounded corner or a chain 3 for a more square corner. If the shape is wonky in the end, block for crisp results.
With the 2025 update, Round 4 for the leaves has been as well with the corners now having 4 stitches in total, rather than 2. I will leave the original instructions in the pattern as “old R4”, and you can choose which version you like better. The updated one helps a ton with shaping so it lays flatter and straighter, and just the overall flow of the row, but both are beautiful options! If the shape is wonky, you can easily block it.
Flower Doily Video Tutorial:
Flower Doily Free Crochet Pattern:
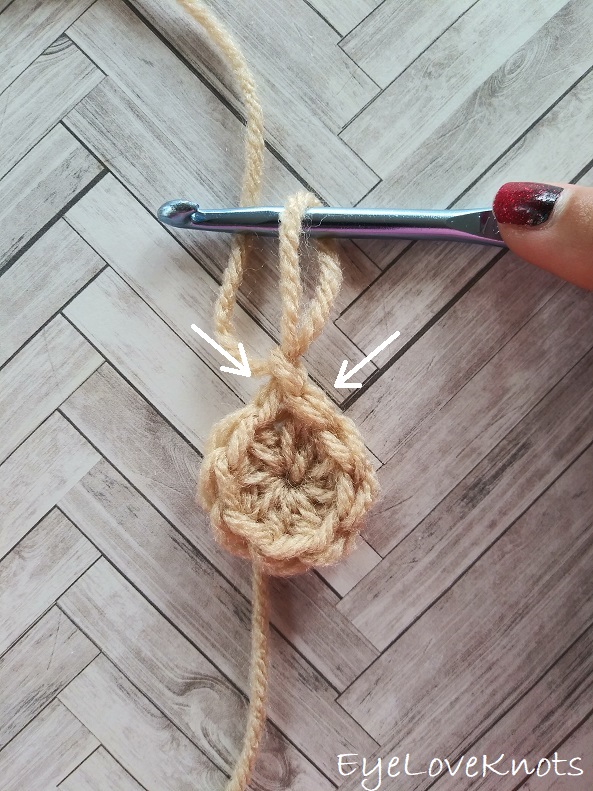
In Yellow, chain 5. Slip stitch to the first chain to form a ring. Chain 1. Work 12 HDC into the ring. Join. (12 HDC)
R2: Chain 1. HDC into the 1st HDC, 2 HDC into each of the next 11 HDC, HDC into the same HDC as the 1st. Join with Pink, and fasten off Yellow. (24 HDC)
R3: In Pink, chain 1. SC into the 1st stitch, skip the next stitch, (3 DC, chain 2, 3 DC) into the next stitch, skip the next stitch, [SC into the next stitch, skip the next stitch, (3 DC, chain 2, 3 DC) into the next stitch, skip the next stitch] 5x. Join with Green, and fasten off Pink. (6 Petals, 6 SC)
Continue On For Doily:
Old R4: In Green, chain 6 (counts as a HDC + chain 4), [SC into the next petal chain space, chain 4, (TC, chain 3, TC) into the next SC, chain 4] 2x, SC into the next petal chain space, chain 4, HDC into the next SC, chain 4, [SC into the next petal chain space, chain 4, (TC, chain 3, TC) into the next SC, chain 4] 2x, SC into the next petal chain space, chain 4. Join to the 2nd chain.
New R4: In Green, chain 5 (counts as a TR + chain 2), SC into the next petal chain space, chain 2, (2 TR, chain 3, 2 TR) into the next SC, chain 2, SC into the next petal chain space, chain 2, HDC into the next SC, chain 2, SC into the next petal chain space, chain 2, (2 TR, chain 3, 2 TR) into the next SC, chain 2, SC into the next petal chain space, chain 2, (2 TR, chain 3, 2 TR) into the next SC, chain 2, SC into the next petal chain space, chain 2, HDC into the next SC, chain 2, SC into the next petal chain space, chain 2, (2 TR, chain 3, 1 TR) into the next SC, which will be where the beginning chain is. Join to the 3rd chain of the beginning chain.
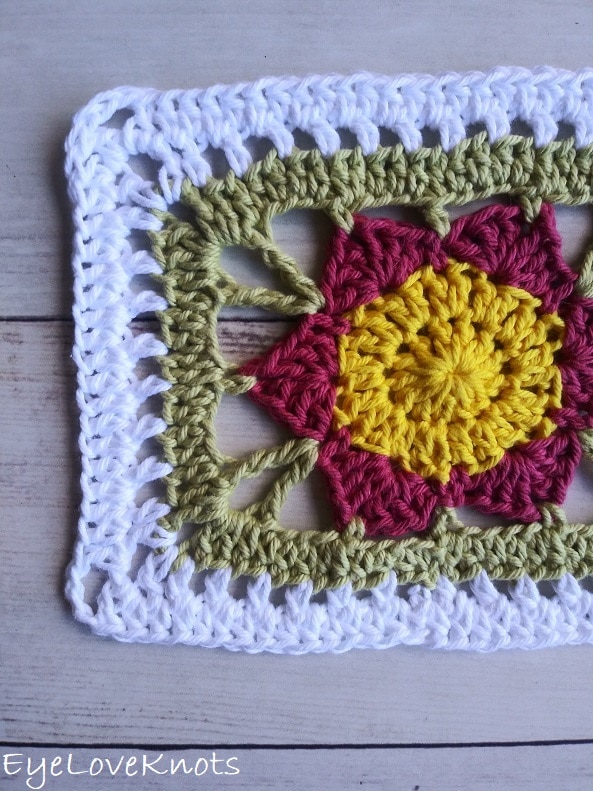
R5: Chain 1. HDC into the 1st stitch, [HDC across to the next chain space, (2 DC, chain 3, 2 DC) into the chain space] 4x, HDC across. Join with White, and fasten off Green.
R6: In White, chain 1. HDC into the 1st stitch, (chain 1, skip 1 stitch, HDC into the next stitch) 6x, (DC, chain 3, DC) into the chain space, [HDC into the next HDC, (chain 1, skip 1 stitch, HDC into the next stitch) 7x, (DC, chain 3, DC) into the chain space, HDC into the next HDC], (chain 1, skip 1 stitch, HDC into the next stitch) 12x, [HDC into the next HDC, (chain 1, skip 1 stitch, HDC into the next stitch) 7x, (DC, chain 3, DC) into the chain space, HDC into the next HDC], (chain 1, skip 1 stitch, HDC into the next stitch) 5x, chain 1, skip 1 stitch. Join.
R7: Chain 1. HDC into the 1st stitch, [HDC across to the next chain space, (DC, chain 3, DC) into the chain space] 4x, HDC across. Join.
*If you would like your doily to be larger, you can simply repeat the last two rows increasing the number of stitches as you go.
Fasten off, and weave in ends. Block if desired – I did not block, I just finger pressed.
Please feel free to make and sell your own items made using this pattern, but keep in mind, this written pattern and my photos are protected by copyright. Please DO NOT claim this pattern as your own nor should you sell my pattern. DO NOT re-publish my photos as your own. DO NOT copy and paste my pattern anywhere, link to it instead so other’s can visit. Making videos providing instructions how to make my projects on any social media platform is also not permitted.

Join one of our awesome Facebook groups to share your creations, and see what others are up to!
– Yarn Crafts & Coffee Community
– DIY Home On Rockwood Lane
– Alexandra Lane Lifestyle
Linked Up To…
Ginx Woolly Linx Party May – Ginx Craft
Loop Scoop #14 – Moogly Blog
Farmhouse Friday #205 – County Road 407
Tuesday Turn About #100 – My Wee Abode
All About Home #92 – Common Ground
Home Matters Linky Party #332 – Modern on Monticello
Create, Bake, Grow and Gather Party – Shabby Art Boutique
Craftastic Monday Link Party – Sew Can Do
{Wow Me} Wednesday #505 – Ginger Snap Crafts
Creative Crafts #42 – Creatively Beth
The Wednesday Link Party – Oombawka Design
Craft Schooling Sunday – Creative Jewish Mom
Happiness is Homemade #375 – Decor Craft Design
Handmade Monday #228 – Sum of their Stories
The Really Crafty Link Party #267 – Keeping it Real
Creatively Crafty Link Party #276 – Life Beyond the Kitchen
Artsy-Fartsy Party #345 – Artsy-Fartsy Mama
You’re the Star Blog Hop – Decor Craft Design
Unlimited Link Party 26 – Grammy’s Grid
The Hearth and Soul Link Party – April, the 21st Century Housewife
590th Inspire Me Tuesday – A Stroll Thru Life
Fabulous Party 372 – Lou Lou Girls
Party in Your PJs #359 – The Apple Street Cottage
Your Whims Wednesday #512 – My Girlish Whims
Thursday Favorite Things #490 – An Artful Mom
Encouraging Hearts & Home Blog Hop – Scratch Made Food
Traffic Jam Weekend Linky Party #282 – My Bijou Life
Friday Favorites – Busy Being Jennifer
Funtastic Friday Link Party #333 – Simply Beautiful by Angela
Link Your Stuff – Annemarie’s Haakblog
A Morning Cup of Joe – The Cottage Market
Snickerdoodle Create Bake Make Link Party 386 – EyeLoveKnots
One More Row Free Crochet Pattern Link Party #33 – Loops and Love Crochet
Very pretty! Thanks so much for linking up with me at the Unlimited Link Party 26.
The floral pattern is so pretty. Thanks for sharing it. Makes me wish again I knew more about crocheting. #HomeMattersParty
Thank you, Donna! Never too late to learn 😉
Question about Lily’s Floral Rectangle Doily or Mug Rug
I really LOVE this crochet pattern and appreciate your sharing with everyone.
I’m at a standstill on the Green ROW 5… How do you get all of thesitches in each of the chain spaces…. All that the directions say is “HDC across to the next chain space and do the next corner”…. how many DC or HDC do you put in each of the chain spaces? The picture shows the chain spaces filled with stitches but the directions don’t indicate how many stitches are in each chain space to create the pretty green border around the center flower.
I’m sure I’m mis-reading or just not understanding how to create the row of green stitches and I would really appreciate any help you can give me. I was hoping to make these for my friends and family for Christmas.
Thanks in Advance for the help.
So glad you like it, Vicki! What a lovely gift idea! Row 5 is 1 half double crochet worked into each stitch, and there are 4 chains here.